Along with the onset of cold weather, the owners of country houses are forced to take up snow removal again and again. The article will tell you how to make a snow blower for a walk-behind tractor with your own hands, the principle of operation, characteristics and features. As well as advice and recommendations on choosing the best option among the models offered on the market.
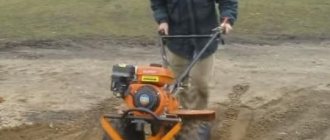
The walk-behind tractor is often equipped with a special nozzle for clearing snow.
How is a snow blower for a walk-behind tractor
If we consider models that are commercially available, the principle of their operation will be approximately as follows: the device consists of an engine, front blades that pick up snow and a rotor assembly inside the mechanism. Due to the operation of the engine, the auger rotates, which breaks the layer of snow in front of itself and rakes in its crushed parts. The rotor blades, raking up the snow, feed it into the device, and then push it out through the outlet pipe to a distance of several meters.
Such a two-stage design is quite convenient in operation, however, it is more typical for finished devices and has some difficulties when implemented independently. Therefore, when it comes to making a snow blower for a walk-behind tractor with your own hands, it is better to use a simplified mechanism.
Walk-behind tractor with a two-stage snow plow
There are many options for self-manufacturing devices: someone uses the blades located on the auger to throw snow, while someone, on the contrary, prefers using a rotor, while simply raking the snow on their own with a bucket. In any case, both options can significantly facilitate the process of snow removal.
It is quite simple to decide on your own the type of snow blower from the walk-behind tractor that you want to make. There are only three main types of devices: screw, rotary and two-stage. Considering one or another manufacturing option, you will understand what their differences are and will be able to make the right choice for yourself.
How to make a snowplow from a walk-behind tractor with your own hands - instructions with assembly drawings
In order to significantly reduce the time for reinstalling the motor, quick-release mounts should be installed on home-made vehicles.
You can create a harvesting unit on a TV-6 lathe. To make a snow blower for a walk-behind tractor with your own hands, it is recommended to adhere to the drawings.
- A box is made of iron sheets, the ends of which are bent into a kind of skis.
- A shaft is made from a pipe, at least 5 cm thick.
- In the box, a grip is welded, made of two welded bent plates in a U-shaped way. Both plates must be rotated not 180 degrees in relation to each other.
- An auger is made by hand from a conveyor belt (1.5 m long and 10 mm thick). With an electric jigsaw, 4 rings are cut from the tape (diameter = 28cm). If there is no electric jigsaw available, then you can replace it with a special plank with two screws screwed into it.
- Such a board is used in the form of a compass - rotations in a circle. With this manufacturing method, high-quality rings are obtained.
- In a casing made of galvanized iron, make a hole opposite the spreader and install a pipe into it. This pipe will serve as a snow spreader. Holders are welded to the pipe on both sides of the spreader.
- Above the drive shaft of the auger, you need to install a gear or a pulley (the choice depends on the drive). The auger is welded to the finished plates, two rings on each side). The rings on one side are cut and welded to the beginning of the other end.
- One side of the blank is welded to the gripping blade, and the other end, reinforced with a steel strip, is welded to the shaft at a distance of 5–10 cm from the free end.
- Select a screw drive.
- It can be both chain and belt. A belt drive should be used if the engine has a pulley and if the auger jams during operation, the belt will slip safely.
- The grip body should be 2-3 cm larger than the pulley. In this case, the pulley will not cling to the housing, but a small gap between them will remain.
- To protect the auger from breakage, it must be provided with a spare pin that breaks off in case of jamming of the auger.
- A round hole is made behind the grip, into which a bent pipe of the required caliber is inserted and welded.
- Check that the distance between the gripper blades and the back wall of the box is as small as possible.
- Attach glasses to the sides of the box.
- It is better to create glasses from AMgb aluminum and fasten them to the car with MB bolts. Bolts must be tightened with nuts.
- The shaft rotates in bearings located in the glasses. He should look out of the box at a distance of 5 - 10 cm.
- The swivel gutter can be made from a sewer pipe (160 mm in diameter). A chute is attached to this pipe, which sets the direction of the snow. This chute is attached to the body of the pipe located on the screw, with the same size.
- The diameter of the chute must be greater than the width of the auger plate responsible for ejecting the snow mass.
- At the end of the shaft, an asterisk is welded to change speeds.
- The sprocket and shaft are connected to the walk-behind tractor with a chain.
- The rotor is connected to the front wall of the housing with rivets, 4 mm in diameter. If skis are installed on the unit, then wooden bars can be installed under them. Or screw strips of plastic.
- Make a frame from steel corners (50 * 50 cm). Corners measuring 25 * 25 mm are attached to the transversely installed corners. The power unit is attached to them.
- The handle of the machine is bolted to the longitudinal corners.
- After the assembly is completed, the snow blower can be spray-painted.
From the drawings below, you can assemble both an independent snow blower and a nozzle on a walk-behind tractor.
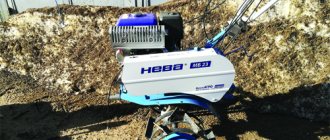
Snow blower for motoblock Neva
Do-it-yourself Neva snow blower for a walk-behind tractor is perhaps one of the most popular options today. This design will be quite easy to assemble, and most importantly - very efficient in operation. It is enough just to select and install a snowplow nozzle on the Neva walk-behind tractor.
The snowplow for the Neva walk-behind tractor can be made independently or purchased ready-made
However, it is the price of a snowplow for the Neva walk-behind tractor that often becomes a stumbling block. Depending on the model, its cost can be from 16,000 rubles. For this reason, a fairly common phenomenon is home-made models. Consider the three most popular options:
- bulldozer attachment for a snow blower on the Neva walk-behind tractor. The price of such an option in finished form will be quite high, while doing everything with your own hands is quite simple, and the result will not be inferior to the factory device. Using a special adapter, a nozzle is attached to the walk-behind tractor like a bulldozer. In this case, a metal sheet with a pointed end, which is also called a knife, is used to break the snow cover. The snow cover is literally cut off by the device, after which it is simply set aside;
The easiest option is to use a snow plow on a walk-behind tractor
- the second option is more difficult to implement, and it will require drawings. However, if you choose the right scheme and have a welding machine at your disposal, you can make a very convenient and productive snowplow. The principle of operation of such a do-it-yourself snow blower for the Neva walk-behind tractor is as follows: as in the finished rotary nozzle, there is a box, an auger and a pipe responsible for ejecting snow. Such a two-stage system allows for maximum efficiency of the device, but its manufacture will require a little more time and effort;
- the third option is a fan snow thrower. The mechanism of such a device is similar to the principle of operation of a conventional fan. Special blades rake up the snow, which is immediately thrown to a certain distance through the pipe. Despite the apparent simplicity, this option is quite complicated for independent implementation and requires certain skills. But if you have enough free time and desire, then it is quite possible to give preference to this method.
Drawing of a snow blower for the Neva walk-behind tractor
What is better, buy a snow blower for the Neva walk-behind tractor or make it yourself?
It is difficult to give an unambiguous answer to the question of which is better, to purchase a ready-made snow blower or to make your own. On the one hand, the purchase of a factory model is not cheap, and often beyond the reach of an ordinary user. But on the other hand, it is not always easy to make such a device for those who have not previously encountered such a task. It requires certain skills and efforts. So before making a decision in favor of one or another option, it is better to sensibly assess your capabilities.
A device such as a mounted snow blower for the Neva walk-behind tractor requires care. Otherwise, its service life will be short, regardless of whether you bought it or made it yourself. First of all, carry out a regular inspection of all fasteners, and tighten them if necessary. In addition, it does not hurt to regularly check the condition of the bolts and belts to avoid breakage during operation.
Ready mounted snow blower for the Neva walk-behind tractor
Recommendations for making a snow blower
Since you can make three types of attachments for snow removal yourself, it is worth considering all the options. As a result, it remains to choose the most suitable for each specific case.
bulldozer type
This homemade snow blower, in addition to the walk-behind tractor itself, consists of an adapter to which the nozzle is attached. It resembles a dozer blade and is the easiest to manufacture. As a knife that cuts a layer of snow, a metal sheet is used, which must first be sharpened. also made of sheet metal , after which they are welded.
The blade is mounted on the main block by means of brackets and rods. The tie rods should be attached to the dozer lugs and brought to the control levers using rollers or metal tubes. This simple device will make a snow blower out of your walk-behind tractor.
Snow blower
This type of snow removal equipment consists of several elements:
- Open box.
- Screw.
- Reducer, but you can do without it.
- Chain transmission.
For the manufacture of the box, sheet iron and a welding machine are required.
The lower ends of the box must be bent in the manner of skis. The shaft is made of a pipe with a diameter of at least 50 mm. It is also necessary to make two U-shaped plates for fastening the auger, which are welded in the middle of the shaft. It should be noted that they must be installed by turning them at an angle of 180 degrees relative to each other. To make an auger, you will need four rings made of a sheet of metal. They must be cut on one side, and the ends open to the size of the diameter. After that, one end of the ring is welded to the gripper blade, and the other should be reinforced with a metal strip. is cut out behind the gripper , into which a pipe of the appropriate diameter is inserted.
It should be remembered that the distance between the blades and the back wall of the box should be minimal. The shaft should be mounted on bearings so that one end protrudes from the box by 50-100 mm. This is where the chain sprocket will be attached. A snow blower attachment for a walk-behind tractor made in this way will perfectly cope with the task and will greatly facilitate the life of the owner of a country house in the winter.
Fan unit
This snow blower contains the following items:
- Drum mounted on a bearing.
- Impeller with blades.
- Dumps.
- Box with pipe.
In the upper part of the drum, it is necessary to cut a hole for the exit of snow, and then press the impeller into it. In this case, it should be positioned so that the blades are parallel to the axis of rotation. Dumps should first be sharpened and then welded to the drum.
Do-it-yourself rotary snow blower for a walk-behind tractor: drawings and photo examples
Having a working walk-behind tractor and drawings available, a do-it-yourself rotary snow blower for a walk-behind tractor is quite a feasible task. Using the assembly diagrams, you can make the missing elements of the device and use the device for its intended purpose. At the same time, when choosing a drawing for work, pay attention to the specified product parameters. Picking up the drawing, you will see that without fail it shows all the necessary details with indications of their dimensions in millimeters. To work, you will need sheet steel, a welding machine, as well as access to a lathe (or the ability to contact the master).
The main part of any snow blower is the auger. For its manufacture, we use a pipe and half-disks made of sheet steel 2 mm thick. The disks are welded onto the pipe, forming a double-sided spiral in the right and left parts. In order for the structure to be strong, special attention must be paid to the welding points.
Handmade auger for rotary snow blower
The next step is to ensure the mobility of the screw. To do this, use ball bearings 203. Using bolts and nuts, their housings must be attached to the side parts of the snow blower. Thus, the auger will rotate and supply snow, which cuts, to the rotor.
An aluminum boiler with a volume of 20 liters is quite suitable as a basis for a rotor. Using 4 mm rivets, it is attached to the front wall of the case. So, getting into the drum, the snow will be thrown out by the blades at a distance of several meters (usually from 3 to 5 m).
It is also worth paying attention to the organization of the torque that is transmitted to the snow blower from the walk-behind tractor. It is transmitted directly from the motor block engine itself to its shaft, which is already connected to the shaft of the snow blower itself. For this purpose, the A-100 belt and the corresponding pulley are perfect.
Drive shaft diagram. 1 - leading sprocket; 2,4 - plain bearing housings; 3 - shaft; 5 - drive sprocket; 6.9 - feather keys; 7 - oiler; 8 - bearing sleeve; 10— latch
The body of the snow blower itself is easy to manufacture according to the scheme using steel sheets 2 mm thick. Rivets 4 mm in diameter, as well as M4 screws, are perfect for fastening.
Detailed description of the methods
Bulldozer homemade snow blower for walk-behind tractor.
A bulldozer-type blade is made of steel sheet. Dimensioned according to the drawing. Welded. The blade is attached to the walk-behind tractor with brackets with rods that will need to be made. The lower part of the blade is a knife. They cut off the snow and take it to the side. Pass the rods (device for turning) from the blade into the eyes in the blade and pass through the attached tubes to the control. For convenience, a stroller is made from different parts, consisting of a frame, two additional (rear) wheels, and a seat. The frame is hinged to the walk-behind tractor. Ahead is a blade controlled through the traction of the walk-behind tractor. The handles of the walk-behind tractor are the steering wheels of the device. The two rear wheels are spaced for stability. The wheels of the walk-behind tractor become the front wheels of a homemade bulldozer - a snowplow.
Do-it-yourself bulldozer snow blower for a walk-behind tractor
Screw snow plow walk-behind tractor.
A box for the auger is made from a steel sheet. Below the box is like skis. Eyelets are made in the box from the sides through which the shaft will be threaded. A metal tube will be put on top of the shaft inside the box, on which the screw elements are welded: 2 metal rings each. On the tube in the center it is necessary to weld the grip. It is made from two pieces of a light corner, connected together, welded, and welded to the tube. At the end, it is desirable to weld the main structural element - the gripper spatula. Do it with the expectation that there is a minimum distance between the blade and the back wall of the box.
Be sure to read: How to make a plow for a walk-behind tractor with your own hands
To this construction pipe welded in the middle, the outermost ends of the auger blades are welded. The other ends of the auger (right and left sides) are welded to the tube, the welding is reinforced with an additional strip of steel on both sides. On the right and left sides - spirals towards each other. We insert the finished screw into the casing. Through the tube (screw axis) with welded spirals and gripper structure, a shaft is inserted. through the side eyelets.
The tube with welded elements is inside on the shaft, in the gap between the inner walls. We drill along the edges of the tube and shaft. We fix the shaft with the tube with two bolts and nuts. At the walls of the box, where the shaft is threaded, we make fasteners. There must be bearings in the sockets (glasses) on the shaft. Bearings in glasses must be selected closed type. To prevent snow from getting into the bearings. The shaft should stick out of the box body. The auger for the walk-behind tractor is fixed.
Put a pulley or sprocket on the end of the shaft. For belt or chain drive. Connect the created system with the walk-behind tractor mechanism. Chain or belt drive. If the pulley is at the bottom, then the A100 belt will go, for transmission from the walk-behind tractor. From a plastic pipe for plumbing, make a swivel gutter. Attach a snow chute to it. It should be wider than the width of the auger. To prevent the auger from being clogged with snow. Additionally: the wheels of the walk-behind tractor can be replaced with skis. It is necessary to make compact wide short skis for a walk-behind tractor. Then the snow will be easy to clean. You can also leave the wheels if the surface to be cleaned is smooth, for example, asphalt.
Do-it-yourself auger snow blower for a walk-behind tractor
Fan snow thrower for walk-behind tractor.
First, an oval box is made of metal to suck up snow. On the back side of the box, with various tricks, it is necessary to mount a glass with a bearing (the bearing is closed), together with the fan impeller. Protect the fan with a grille (casing). Bearings (4 pieces - in pairs on both sides) hold the shaft inside, on which the fan is put on. The back of the shaft is fixed in the bracket, where there are two sealed bearings. The shaft peeks out of the device. At its end there is a gear or an asterisk, from where the transmission goes through a belt or chain to the propulsion mechanism of the walk-behind tractor. In the oval box, next to the fan, there is a wide hole at the top. A light curved tube is inserted into it. Wide enough so that the ejected snow does not get stuck. A mounted snow blower for a walk-behind tractor is ready.
Do-it-yourself fan snow blower for a walk-behind tractor
How to choose and buy a snow blower for a walk-behind tractor
But it also happens that, after looking at the instructions and diagrams on how to make a snow blower on a walk-behind tractor with your own hands, you came to the conclusion that such an activity is not for you, and it will be much easier for you to purchase a ready-made device. However, the prices of snowplow attachments for walk-behind tractors, as well as their characteristics, differ markedly from each other. Making the right choice is not always easy. As an example, consider the most popular options that are in greatest demand today.
Today's market offers many different designs of mounted snow blowers for walk-behind tractors.
Snow blower for Salyut walk-behind tractor: characteristics and features
The snowplow attachment for the Salyut walk-behind tractor allows you to clean the surface of the earth from snow at temperatures from -20 to +5 ° C. It is recommended for use only on flat surfaces, and can be purchased in two different modifications, which differ from each other in the way they are attached to the walk-behind tractor.
Main technical characteristics and parameters:
- dimensions - 600x640x820 mm;
- surface capture width - 500 mm;
- the maximum layer of snow that can be captured is 17 cm;
- screw speed - from 1900 to 2100 rpm;
- weight - 60 kg.
Principle of operation:
- the active part of the structure, the auger, rotating, scoops up snow on its way from the edges to the center;
- special blades located in the center push the snow into the housing nozzle;
- then the snow is thrown to the side.
The snowplow for the Salyut walk-behind tractor is recommended for use on flat surfaces
In this model, a lot of adjustments are available, including the snow throw distance, which can be changed using a visor, as well as engine speed. In addition, you can change the direction of the snow throw by rotating the screen.
The installation of the snow blower on the Salyut walk-behind tractor is carried out as follows: the footboard of the walk-behind tractor is disconnected, the cotter pin and the footboard mounting axis are removed. On a flat surface, the snow blower is mounted on a walk-behind tractor. To do this, it is necessary to insert the hitch into the frame in such a way that the bolt with the spacer sleeve enters the groove of the hitch. After that, connect the hitch to the snow blower body using two bolts, without tightening them.
After that, it is necessary to put on the snow blower drive belt, having previously removed the protective coating of the power take-off shaft pulley. When moving the hitch along the beam, adjust the relative position of the elements so that the belt is hooked evenly, without distortions. After that, you can tighten the bolts. Next, the protective coating of the power take-off shaft pulley is installed in place and fixed.
Attachment scheme for attachments of the Salyut walk-behind tractor
MTD snow blowers: which model is better to choose
Another popular option to avoid making a snowplow for a walk-behind tractor with your own hands is to purchase special equipment manufactured by MTD. Today, it is considered one of the best, and has a fairly wide selection of models, the most popular among which are MTD-M 61, MTD-ME 66, MTD-640 and MTD-M56.
After reviewing the technical characteristics, as well as the main tasks that these devices are designed to solve, you can easily decide which option is best for you. For example, the M-61 model is great for clearing a large flat surface, while the ME-66 is more focused on difficult weather conditions and severe icy snowdrifts.
The cost of snow blowers also varies depending on their purpose. So, the most budget model is the M-56. Its cost ranges from 35-37 thousand rubles. The ME-61 will cost a little more - about 49 thousand rubles. The M-61 can be considered an average option - 44 thousand rubles.
Snow blower manufactured by MTD
DIY manufacturing
For those who do not want to overpay for factory modifications, and understand the principle of operation of equipment, have the necessary materials and skills in plumbing, they can independently make such attachments that will be no less effective than many store products, and often much more effective.
Snow blower from a cultivator rework features
The principle of re-equipping a snow blower from a cultivator with your own hands is to expand the functionality of existing equipment. This can be done in 2 ways.
- Completely convert the cultivator into a specialized snowplow.
- Attached equipment for installation on a walk-behind tractor or cultivator.
The first option is rather complicated and expensive. Therefore, here we will consider the second method.
Preparation of materials and equipment
To realize your idea, you must have the following tools and materials:
- Bulgarian;
- Welding machine
- Drill;
- Hacksaw for metal;
- Spanners;
- Bearings (closed);
- Profile pipes;
- metal corners;
- Steel sheet;
- Plywood;
- A piece of plastic sewer pipe;
- Conveyer belt.
Work should begin with the preparation of a detailed drawing and the necessary materials, according to the chosen design.
Making a snow blower procedure
First you need to make a supporting structure. To do this, a frame is made from metal corners using a welding machine. First, all parts of the structure are connected by spot welding. The field of verification that all dimensions are exactly maintained and there are no distortions, all elements are firmly connected by a continuous weld. The screw shaft is best made from a steel pipe with a diameter of 40mm. In its middle part, using a drill, you need to make a through hole to install a metal plate. The latter will perform the function of a shovel, which, when the shaft rotates, will throw snow in the direction selected by the operator. For the manufacture of the handle, you can use a pipe with a diameter of not more than 20 mm.
In the process of work, snow masses will not immediately flow to the shovel. Their supply will be carried out using a 2-input auger. To make it, you will need a conveyor belt, from which you need to cut 4 rings with a diameter of 280 mm. You can also use the side of the old tire for this.
The platform must be strong and secure enough to support the cultivator's engine. Between the power unit and the platform you need to lay a thick rubber mat that will reduce vibration. The platform is made as follows - 2 metal corners are welded to the pipe and then this structure is fixed at an angle of 90 degrees relative to the blade.
The next step is to install sealed bearings into the shaft. To perform this operation, you need to saw through the ends of the shaft a little and tap with a hammer. In addition, you need to prepare a groove for the key on one side of the shaft.
The ejection of snow mass from the structure will be carried out through a rotary chute. It can be made from cutting a plastic sewer pipe with a diameter of at least 160 mm. This is necessary to ensure free movement of snow along the gutter, if the diameter of the pipe is smaller, then snow masses may be delayed during operation.
To securely fix all the elements on the frame of the mounted snowplow, a pipe must be welded to the auger. The gutter is attached to a ready-made and assembled structure. The direction of snow mass ejection will be adjusted through a cut of a plastic sewer pipe.
An important point is that the blade width should be 20-30 mm less than the diameter of the discharge chute. This will ensure a quick removal of snow from a homemade snow blower.
To facilitate the movement of equipment on slippery surfaces, it is necessary to install skis on it. Usually, thick plywood is used for this, preferably moisture resistant. Plastic strips can be additionally installed to the bottom surface of the skis. Thanks to this, the movement of equipment will be smoother and faster.
All metal structural elements must be painted. This will protect them from corrosion. Especially important, given that the equipment will be constantly operated in conditions of high humidity.
Before starting work, the assembled snow blower must be carefully checked. In this case, special attention should be paid to all connections and attachment points of the structure. Then introduce lubricants and fill with fuel. Next, start the engine and let it idle for 5 minutes. When the power unit warms up a little, you can test the snow blower in operation. It is advisable to do this on a site with fresh (not packed) snow. When working, you need to pay attention so that the cultivator snow blower does not make unnecessary noise, does not smoke excessively and does not overheat. If the first test goes well, you can move on to areas with denser snow cover.
Recommendations for the operation of a walk-behind tractor with a snowplow nozzle
Regardless of whether you prefer to buy a snow blower for a walk-behind tractor, or use a homemade device, there is a set of rules that are recommended for working with equipment of this type. By adhering to them, you can not only extend the life of the device, but also avoid many dangerous situations:
- Before starting work, be sure to conduct a thorough inspection of the surface on which you plan to clear the snow. Otherwise, along with snow, foreign objects may get into the mechanism, which will lead to breakage. In addition, throwing such an object at a decent distance, the snow blower can harm someone's property or health;
- be sure to take care of your own safety: clothing should be comfortable, seasonal, without long parts that can get into the moving mechanism. The choice of shoes also needs to be approached responsibly - it should not slip. In addition, it is strictly forbidden to use a snow blower without first putting on goggles;
- In case of any unforeseen situation, turn off the device completely first. You can only start troubleshooting the problem if you are sure that the snow blower is turned off;
When using a snow blower, follow the precautions and safety precautions
- The snow blower attachment on the walk-behind tractor is designed to work on relatively flat surfaces. Do not use it on too steep slopes or slopes;
- according to the safety regulations, the distance to be observed in work from the side of the snow throw is 10 m. Check that there are no people, cars, etc. in this gap during the snow removal;
- when working with wet, slightly melted snow, be sure to take breaks from work to make sure that no part of the snow blower is clogged with snow.
If you follow all these rules, then a rotary snow blower for a walk-behind tractor can be considered a safe device. The main thing to remember is that such devices do not tolerate haste and fuss. If you decide to clear the snow, allocate enough time for this, and approach this task as responsibly as possible.
As you can see, the annual need to clear snow can become less tiring for quite affordable funds. Depending on your desires and capabilities, you can purchase a snow blower from the manufacturer, or make it yourself. In any case, this will greatly facilitate your work and allow you to spend much less time on snow removal than would be required for manual work.
