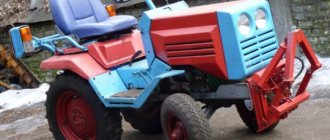
Many owners of walk-behind tractors often think about upgrading their agricultural machinery. In fact, it will not be difficult to improve the unit at your disposal, and make a full-fledged mini tractor out of it. However, you will be required to study the recommendations and follow the procedure - this will give you the opportunity to get an effective home-made mini tractor that will be able to solve absolutely all the tasks assigned to it.
Do-it-yourself mini tractor from a walk-behind tractor - manufacturing procedure
Before you start manufacturing a mini tractor based on a walk-behind tractor, you will need to prepare the materials necessary for work. The conversion kit includes:
- apparatus for welding;
- screwdrivers and wrenches;
- electric drill and a set of various drills;
- grinder and a set of disks for working with metal;
- set of nuts and bolts.
Suitable drawings will help to correctly assemble a tractor from a walk-behind tractor. In them you will find information on the order in which to connect the parts and what method of fastening is suitable for their reliable installation.
The conversion of a walk-behind tractor into a mini tractor is carried out in the following order:
- A minitractor based on a walk-behind tractor must be equipped with a strong, reliable frame. It must withstand an additional pair of wheels, plus the load carried in the tractor will put pressure on the supporting structure. For the manufacture of a solid frame, pipes or metal corners are best suited. Be sure to keep in mind that the heavier the frame, the better the grip of the mini tractor with the road will be, and the better the plowing will be. The thickness of the walls of the frame also does not matter much - the main thing is that they do not bend under the pressure of the cargo being transported. You can cut the blanks for making the frame using a grinder. Then all the parts are interconnected, first by means of bolts, after which they are finally welded to each other. To make the frame stronger and more reliable, equip it with a cross beam;
- Immediately after the manufacture of the frame, it can be equipped with a hinged mechanism, through which a small tractor will be equipped with additional devices. You can install the hitch both in the front and in the rear of the supporting structure. If in the future the manufactured mini tractor is planned to be used in tandem with a trailer, then a tow bar should be welded to the rear of its frame;
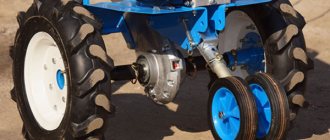
- At the next stage, the homemade product is equipped with front wheels. To do this, the manufactured mini-tractor is best equipped with two ready-made hubs with brakes provided for them. Next, you need to fix the wheels themselves. To do this, take a piece of steel pipe, the diameter of which fits the front axle. Next, attach the wheel hubs to the tube. Drill a hole in the central part of the pipe, which is necessary for mounting the product to the front of the frame. Then install the tie rods and adjust them to the frame using the worm gear. After installing the gearbox, install the steering column. The axle in the rear part of the manufactured tractor is mounted through pressed bearing bushings. Wheels used must be no larger than 15 inches in diameter. Smaller parts will lead to “burrowing” of the unit with the front part, and larger wheels will significantly impair the maneuverability of the minitractor;
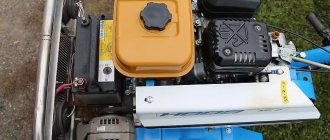
- At the next stage, it is necessary to equip the minitractor with an engine from a walk-behind tractor. It is best to install the motor at the front of the implement, as this will improve the balance of the agricultural machine when operating with a loaded trailer. To install the motor, equip a reliable mounting system. When mounting the motor, do not forget that the power take-off shaft must be fixed coaxially with the pulley located on the rear axle of the mini-tractor. The force on the wheels must pass through a belt drive. The video will tell in more detail about the conversion of a walk-behind tractor into a minitractor.
A self-made tractor will remain equipped with a reliable braking system and a high-quality hydraulic distributor, which is necessary for the proper operation of the unit with attachments.
Refurbishment
The creation of a homemade product must begin with the study of the kinematic diagram and drawings, as well as the preparation of the relevant assemblies, materials, parts and tools. You can prepare a diagram yourself or take this example as a sample.
If you do not feel very confident in matters of alterations and fractures, you can purchase a special kit that contains all the necessary parts for converting a walk-behind tractor, namely:
- rear linkage with manual lifting mechanism;
- fenders, seats, footpegs and pedals;
- front beam, brake discs, wheel hubs;
- frame with necessary fastenings for the engine;
- steering with rods;
- semi-axle lock release levers.
Domestic offers kits for converting a walk-behind tractor into a mini tractor with various configuration options - basic, hydraulics, brake system. The price of the basic set is quite acceptable - within 7 thousand UAH.
Usually, when assembling a homemade tractor with a set of parts, even novice mechanics do not have any special difficulties. In addition, today in many cities there are workshops specializing in the conversion of Salyut walk-behind tractors into mini tractors.
Naturally, this option is not suitable for those who want to make a unique sample and save a lot, for example, a 4x4 break.
When altering, it should be remembered that for non-standard adaptation of the walk-behind tractor, alterations and refinements will be required, many nodes must be made and connected in an extraordinary way.
Important design points for conversion:
- Landing the driver on the equipment raises its center of gravity, which means that, in order to avoid tipping over on a sharp turn, it is necessary to make the second driven axle wider - at least 1-1.2 m.
- Expansion of the wheelbase of the walk-behind tractor. Today you can buy ready-made bushings, installing which on the front drive shaft of the walk-behind tractor increases the distance between the wheels, so you can safely do without the services of a turner.
- If there is no differential, then the issue of increasing the maneuverability of the homemade product is solved by installing blocking swivel extensions, at the same time it will be possible to increase the wheelbase.
Minitractor from the Neva walk-behind tractor
Converting a walk-behind tractor into a small tractor may be slightly different. It all depends on the design features of the walk-behind tractor and its capabilities. Consider the principle of manufacturing a mini-tractor from Neva brand walk-behind tractors.
As in the first case, before making a mini tractor, you need to study the schemes. They detail the dimensions of the elements and the order of their installation during assembly.
The procedure for conversion will be as follows:
- The frame is made in the same way as in the first case. To create it, use pipes of various sections. The fastening of the frame elements is carried out by means of bolts and welding;
- Next, proceed to the manufacture and installation of the chassis. To install the rear wheels, use an additional axle, which can be made from a steel pipe. At both ends of the latter, press in the bearings and bushings that will be equipped with the rear wheels;
- Next, the tractor from the Neva walk-behind tractor must be equipped with a motor. Moreover, you can install the engine, both in the front and in the rear of the frame. In the second case, the front and rear wheelbase of the minitractor will need to be expanded;
In the end, the do-it-yourself unit will have to be equipped with a driver's seat, lighting devices and parking lights. Due to its small size, the finished tractor will have high maneuverability, which will allow it to be used effectively in hard-to-reach places.
Homemade mini tractors
Ideal for processing small areas. Almost anyone who understands technology, even at a minimal level, can collect them.
How to make a mini tractor from a Neva walk-behind tractor
First, we purchase the walk-behind tractor itself, on which a lead has already been mounted, factory-made or in the form of a homemade product. Then it will be possible to attach trailers with a body, on which cargo is easily transported, regardless of size. There are other additional details that give comfort when using:
- Brake and gas pedals.
- Seat.
- Steering Wheel.
The volume of Neva motoblocks is usually in the range of 6-8 liters. Therefore, a mini-tractor with such a basis requires a minimum amount of modifications.
How to make a mini tractor from an MTZ walk-behind tractor?
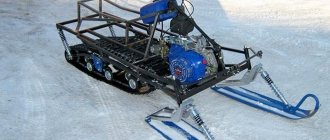
To remake walk-behind tractors of this brand, their design and capabilities should also be taken into account. MTZ units have a sufficiently high power, which makes it possible to make a full-fledged caterpillar mini-tractor out of them. It will be distinguished by high cross-country ability and excellent traction with the soil, due to which the quality of plowing the soil with such a machine will be several times higher than that of wheeled mini-tractors.
Before starting work, be sure to study the drawings, in which you will find all the information required for rework.
The procedure for assembling a mini tractor is as follows:
- First, put the walk-behind tractor into operation mode with a mower;
- After that, completely dismantle the front platform of the unit;
- In front of the manufactured mini-tractor, install a caterpillar drive;
- In the niche intended for mounting the steering rod, install the adjusting rod. This element will increase the rigidity of the entire structure;
- Weld the driver's seat to the top of the frame;
- Arrange a platform for mounting the accumulator and hydraulic distributor near the motor.
This manufacturing method is suitable for converting MTZ 05, MTZ 09 and MTZ 12 walk-behind tractors into small tractors. Each of them has a sufficient power reserve to work together with a trailer and attachments at the same time.
Advantages of homemade tractors from walk-behind tractors
A minitractor converted from a walk-behind tractor is very useful on the farm! It must be done in order to turn routine agricultural work into tireless and interesting activities. A home-made tractor, unlike a walk-behind tractor, will take on the main load, and a person will only have to follow the process and drive the vehicle correctly.
A homemade small tractor is an economical unit of compact size in operation and maintenance that does not require a separate garage, which is also a big plus. It will not create problems with spare parts - they can be found on sale at an affordable price in almost any specialized store that sells scout, Neva, Zubr and other motoblocks.
The advantages of owning such a unit are obvious. Unlike a walk-behind tractor, it will allow:
- expand functionality;
- facilitate the work of the operator;
- realize traction potential.
Using skills, it is possible to make a multifunctional and efficient mini tractor out of a conventional motor cultivator with limited capabilities. Maneuverable, compact - it is able to work even in densely planted areas, between bushes and trees, as well as in a limited area adjacent to the house, without spoiling paving slabs and asphalt.
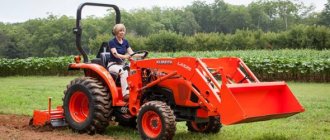
To make a mini tractor from a walk-behind tractor means to acquire agricultural equipment with the widest functionality. Together with it, you can use a variety of attachments: a cultivator, a potato planter, a milling cutter, a harrow, a rotary mower, a plow, hillers, and more. And if you equip it with a hydraulically driven stacker, you can also operate a home-made tractor as a stacker or crane.
Thanks to the practical design, working on such a homemade product is simple, comfortable and safe. A homemade mini tractor is better than the most expensive walk-behind tractor and cheaper than a heavy tractor.
Minitractor from motoblock Zubr
Motoblocks of this brand have a reliable and powerful enough motor, the presence of which allows you to convert the unit into an all-wheel drive mini tractor. Before work, be sure to study the detailed drawings, and also buy steel sheets, pipes and corners.
The procedure for the manufacture of a mini tractor is as follows:
- When arranging the frame, you will need to expand the existing frame of the walk-behind tractor. This is necessary in order to install additional wheels. Cut the corners and pipes into suitable pieces, then weld them together;
- The front beam is mounted on a minitractor using a ready-made hub equipped with brakes. The wheels in the front of the unit must match the size of the rear wheels, or be slightly larger than the latter - this will prevent the mini-tractor from “burrowing” when driving over rough terrain;
- Then install the walk-behind tractor motor. It is best to install it in the front to achieve the best balance of the whole structure;
- Weld a towbar to the back of the finished mini tractor - it will be required for mounting the trailer.
A home-made mini tractor made on the basis of the Zubr walk-behind tractor will be able to cope with a number of the most difficult economic tasks: plowing the soil, mowing grass, harvesting and transporting crops.
Homemade attachments
When the finished mini-tractor has passed all the tests, acquired the status of significance and earned the love of the whole family, the task of manufacturing attachments for it comes to the fore. And it depends on the intended crops and tillage. If a walk-behind tractor was used to create a tractor, then there is already a ready-made unit for coupling with agricultural equipment. In another case, you will have to make a hinge with your own hands, the photo of which is presented.
It shows that the design of the hitch is three-point. It must be movable both vertically and horizontally. It is made from steel profiles using a welding machine. Needed to connect the units.
Of course, it is possible to make a single-point hitch assembly, but this will greatly reduce the number of mounted agricultural processing machines, and, consequently, reduce the multifunctionality of the tractor.
There are several types of agricultural units for cultivating the land.
Types of plows
For homemade tractors, the following types of plows are most often used: single-hull and double-hull. The former cling to light and medium walk-behind tractors, and the latter to more impressive equipment. For a mini-tractor, if it has a powerful engine and a decent weight, they prepare multi-hull moldboard plows that are hooked to a home-made hitch.
The plow is often made from a factory plow skimmer, which is usually used by the MTZ tractor. It is only necessary to slightly modify the plowshare and the correct bend of the blade. It is possible to use a horse plow.
For plowing heavy and hard lands, as well as soils with tree and shrub roots, self-made disk plows are used. They are a frame with sharp discs up to 40 cm in diameter, which cut into the soil at a slight angle relative to the direction of movement. This allows them not only to cut the roots, but also to loosen the ground.
Hillers and harrows
Any homemade hiller consists of a frame and two discs located at an angle to each other. Such a unit is used when hilling rows of potatoes and strawberries.
Harrows are designed to break up clods and loosen plowed land. They are a lattice frame 100 × 50 cm in size, welded from corners 50 × 50 mm, and sharp fingers up to 15 cm long, evenly spaced over the frame area. The harrows hook behind the plow and work together with it.
Potato planters and diggers
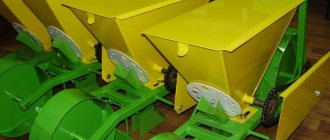
This trailed attachment is used for a specific crop - potatoes. It is driven from its own wheels, which allows you to evenly distribute the seeds along the furrow, and does not depend on slippage.
The potato digger is a sharp knife 20-30 cm wide, which horizontally enters the soil to a depth of 20-25 cm. With the help of an inclined grate, it pulls the potatoes to the surface. At the same time, the tubers are cleared of earth and grass.
Other equipment
Depending on the purpose, other attachments can be used:
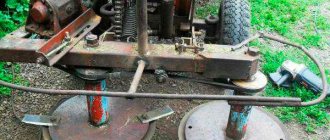
- Mounted mowers. Used for making hay for pets and removing weeds in the garden.
- Rake for raking mowed grass. They are mounted and trailed. Trailers have two wheels. Cling directly to the tractor.
- Mounted cultivators. They usually consist of a frame and 6-8 cultivator shares. The principle of operation is similar to that of a flat-cut plow. They have two wheels, with the help of which the depth of cultivation is regulated.
- Garden sprayers. This is the correct unit. They are sprayed with crops to protect against pests, and they also protect grain from weeds using special chemical compounds. Mainly used in farm fields.
- Bulldozer blades. They hitch in front of or behind the tractor. They are a shovel up to 1.5 m wide. They are made of steel 3-5 mm thick. Fastened with a hanging device. Designed for cleaning the area from snow and debris, as well as for planning the surface of the site.
- Kunas. This special device is used only for loading and unloading. It is made for a specific type of mini-tractor activity.
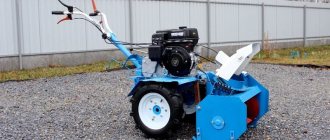
- Rotary brushes and snow blowers. They are especially needed in winter on city streets. A tractor with such equipment is able to clear all the bottlenecks between houses and shops where it is difficult for a conventional tractor to drive up.
Assembling a simple unit, as well as home-made attachments for a mini-tractor, does not present any particular problems. All you need is time, desire, the necessary tools and materials.
Minitractor from motoblock Agro
Before you start reworking motoblocks of this brand, you should stock up on material and the necessary tools. For work you will need:
- stainless steel sheets and profiles;
- seat and steering wheel - can be removed from an old car;
- a pair of wheels - their diameter should not exceed 15 '';
- a set of fasteners;
- grinder and electric drill;
- hammer and welding machine.
After preparing everything you need, we advise you to study the diagrams that will tell you the correct procedure for installing tractor elements.
We also recommend that you look at photos that will certainly help you in the manufacture of an agricultural unit.
Unlike the walk-behind tractors of the manufacturers listed above, the Agro brand equipment has one significant drawback, which must be taken into account when converting a walk-behind tractor into a mini tractor. It lies in the fact that the axis of the walk-behind tractor has very weak fracture strength. This kind of fracture will definitely affect if you exceed the maximum allowable load on the mini-tractor frame. To avoid further malfunction, the mini tractor will need to be equipped with wheel gears.
The procedure for assembling the unit is as follows:
- At the first stage, you need to weld a solid frame for the tractor. To do this, use steel profiles and pipes. Be sure to keep in mind that the heavier the frame is made, the better the grip of the mini tractor with the ground will be. At the rear of the supporting structure, weld the towbar, which will be required to hitch the trailer to the unit;
- Then proceed to the manufacture and arrangement of the undercarriage of the minitractor. To do this, you can purchase a pair of ready-made front wheels, as well as hubs equipped with brakes. After purchasing the parts, attach the hubs to the steel pipe, and drill the holes in the front of the frame that will be required to mount the hubs on the minitractor. Next, install the tie rods using a worm gear. Next to the rods, secure the steering column and rear axle. When installing the latter in the bushings used for mounting, press the bearings. Install the pulley on the rear axle and secure the wheels securely;
- After that, install the engine on the front of the frame. We advise you to do this by means of an additional frame placed on special shock absorbers - this will avoid strong vibrations at high loads on the motor;
- Next, install the driver's seat on the mini-tractor, connecting it to the frame through the springs - thanks to them, it will be much more convenient to work with the mini-tractor.
If desired, a compact tractor made by oneself can be equipped with a canopy that will protect you from rain and sun. To make it, 4 steel pipes must be welded to the frame next to the seat and steering column, to which a steel sheet is fixed by spot welding. As a result, you will get a reliable unit for giving, which will quickly cope with all the tasks assigned to it.
Equipment and parts
The do-it-yourselfer is free to choose the type of chassis, drive. To convert a walk-behind tractor into a mini tractor, you will need:
- two wheels,
- steering gear,
- driver's seat,
- hitch,
- pedals.
It is possible to use parts that often lie around for years in garages or workshops. This is where fantasy comes in. Someone from pieces of old water pipes managed to make an excellent welded frame, someone uses old truck tires.
A heavy walk-behind tractor with a diesel engine is the most expedient variant of alterations, the result will be a really powerful technique, albeit a homemade one.
The frame of the minitractor should be "redrawn" in accordance with the drawing in order to adapt it to the second pair of wheels. The tractor platform can be a tipping or all-metal platform.
With the help of a grinder, you can cut the transverse and longitudinal spars by connecting them with bolts or electric welding. To make the seams strong, a combined fastening is used: fasteners + auxiliary welding of the seams.
The fracture, consisting of two separate half-frames, which are connected with the help of hinges, significantly increases the stability, maneuverability and mobility of the minitractor.
The hitch is mounted to the frame in accordance with the diagram. The welded towbar further expands the capabilities of the mini tractor converted from the Salyut walk-behind tractor.
Video review frame design for a mini tractor
Engine
The engine is usually located in the front, such placement as a whole will balance the design of the minitractor. The belt drive is closed by a guard, the location of the clutch pedal is determined.
Hydraulics are adjusted to operate the necessary attachments. Upon completion of this work, the driver's seat should be installed, if necessary, headlights and side signals.
Chassis
Native wheels from the unit are attached to the rear axle, those that are selected are mounted on the front axle. It is desirable that the tread on them be expressive, this will give a good grip on the surface. Alternatively, it is possible to use used spare parts.
A new set of hubs with a brake system, steering wheel, gearbox, tie rods, steering column - ideal for installing the chassis.
Further, with the help of a metal pipe, the front wheels and wheel hubs are attached. After that, the steering rods are mounted and aligned with the steering gear. Then - fixing the gearbox on the frame, installing the steering rod and steering wheel, adjusting the steering column.
