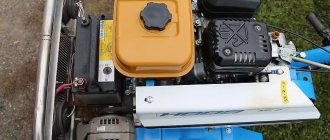
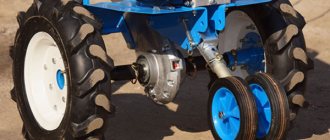
After people see the prices for snowmobiles in the store, they ask how to make a snowmobile from a walk-behind tractor, how expensive and difficult is it? How does the manufacture of homemade products begin - a snowmobile from a walk-behind tractor? First you need to determine how much engine power to use. We used a 6 horsepower motoblock engine as an engine. Usually, four-stroke engines with forced air or water cooling are installed on walk-behind tractors. You can also use a reverse gear, centrifugal clutch, steering and fuel tank from a walk-behind tractor. Next, you need to think about the propulsion of the snowmobile. Most of them are fitted with a caterpillar drive.
How to make a snowmobile from a walk-behind tractor
For our country, a snowmobile is the best vehicle in the winter. It is characterized by high cross-country ability in snowdrifts, as well as good maneuverability. In addition, it has minimal fuel consumption.
On the market you can find snowmobiles from different manufacturers, but they are not cheap, and not everyone can buy them. Craftsmen got the hang of making a snowmobile from a walk-behind tractor with their own hands. This requires the appropriate tools, parts, time and a little ingenuity. The standard set for creating a snowmobile are:
- frame;
- engine;
- tank;
- seat;
- skis;
- steering wheel;
- caterpillars;
- drive unit.
The steering system of this vehicle is at the front. It is controlled by skis.
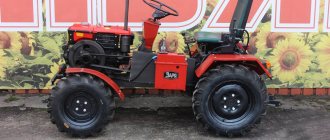
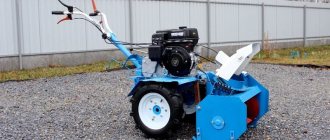
Consider how to make a snowmobile based on the Neva walk-behind tractor. In order to assemble such a machine, you first need a walk-behind tractor. He acts as an engine. In our country, the Neva walk-behind tractor with a Japanese engine and air cooling is very popular. There are 8 models of this brand in total. The motor runs on gasoline, the power of which, depending on the model, varies from 6 to 9 hp. Speeds are switched by a chain reducer. There are only four of them. The capacity of the fuel tank varies from 3 to 5 liters.
In terms of its power, the Neva walk-behind tractor is ideal for converting to a snowmobile. It is universal, since the engine power is enough to transport bulk cargo or several people. The walk-behind tractor can reach speeds of up to 60-80 km / h. On sale there is a caterpillar attachment to the Neva unit, which is easily assembled and installed.
Let's figure out how to make a snowmobile for a walk-behind tractor with your own hands. First you need to develop a rework plan and clearly imagine what you have to do. The ideal option is to create a drawing, according to which it will be possible to accurately carry out calculations. If your drawing is bad, then you can find ready-made drawings of previously made snowmobiles, and choosing a more suitable option, start assembling.
For beginners in this business, it is recommended to create a small layout that can be made from ordinary cardboard. It would be nice to present the future device to consider the already made models of other people in order to have a better idea of the work ahead. There are many homemade snowmobile prototypes on the Internet.
The next step is to make a list of the right materials, parts and tools needed for the snowmobile. After acquiring everything you need, you can safely proceed to the assembly. In general, it is better to divide the assembly of the walk-behind tractor into several stages, so it will be easier to cope with the task. The sequence of work looks something like this:
- Frame manufacturing. The best solution is a finished frame from a motorcycle. If not, then durable pipes are used. With the help of a pipe bender, you can get a platform of the desired shape and, using a welding machine, connect the ends.
- Mounting details. A support (bracket) is welded to the frame, to which the walk-behind tractor will be attached. This is followed by the installation of a walk-behind tractor, a seat and various parts: steering columns, shock absorber, skids, etc.
You need to be very careful and pay special attention to the dimensions of the parts. They must be executed clearly according to the scheme, otherwise the snowmobile attachment to the walk-behind tractor will be subject to alteration due to inaccuracies.
Self-manufacturing
Consider step by step how to make different types of snowmobiles with your own hands.
Snowmobile from a walk-behind tractor on wheels
To turn a walk-behind tractor on wheels into a snowmobile, you will need to take:
- iron connecting structure-trailer;
- wheels for winter use, able to overcome snow barriers.
See also: How to sharpen a saw chain with a file
A strict condition for the whole idea is that the trailer must be rigidly coupled to the snowmobile frame. A metal channel about half a meter long must be welded parallel to the axis of the snowmobile. To do this, two holes are drilled at the edges of the channel. Clamps with holes along the edges provide additional fastening and rigidity of the structure. They are attached to the axle of the snowmobile with bolts and a lock nut, using a crosspiece welded to the structure.
This mount will become a stopper, fixing the trailer, preventing it from moving at an angle. Such an element, although it reduces the ability to maneuver on a snowmobile, but makes it more stable. Thus, a two-wheeled mechanism on one axle can easily be converted into a stable four-wheeled vehicle. In this case, neither schemes and drawings, nor additional costs will be needed.
A snow scooter with a motor will also require the correct selection of wheels. The easiest option is to purchase them in a distribution network for a winter destination, but looking for easy ways is not always advisable. A more economical solution would be to make the wheels yourself. A budget option is to equip the snowmobile module with cameras designed for trucks. The deflated chambers are put on each wheel and fixed over the chain for driving on snow and ice. One is not enough, you need five. An inflated camera in a wafer of chains will be an ellipse with a surface divided into segments, like a daisy.
Another option for using ingenuity and saving the family budget is to use metal hoops over the cameras. They should be wide enough, twice as wide as the snowmobile wheels. The diameter of the hoop must correspond to the inflated wheels of the walk-behind tractor and trailer. On the inside of each hoop, several metal plates are welded. The thickness of the plates must be made about 2-3 cm. Having lowered the cameras, you should put hoops on the snowmobile wheels and pump them up again. The inflated cameras will press against the metal circles as much as possible. Plates like ground grips will help increase traction on a snowy road.
Snowmobile from a walk-behind tractor on tracks
Converting a caterpillar walk-behind tractor into a snowmobile is a little more difficult, but possible. Using the motor block motor, you can make a design with great stability and maneuverability. For this, the frame and transmission are mounted. Make sure that the engine power is sufficient, you will need a walk-behind tractor of at least 6 horsepower. To make a snow motor sledge with an engine, you need to use:
- reducer;
- fuel tank;
- steering;
- centrifugal clutch.
It’s good if you have tracks from other snowmobiles in your home stock. If not, then don't give up. It is quite possible to assemble the caterpillars on your own, using improvised tools and materials.
Next, you need to decide on the location of the engine: front or rear. Try to make the design as light as possible, and the ski suspension as soft as possible. All this will allow you to achieve high cross-country ability in deep snow. The principle is this: inside the caterpillar, 4 wheels roll along the conveyor belt during movement. Special ground hooks are fixed on the tracks to enhance grip. Caterpillars can be made at your discretion, but you should carefully consider the dimensions.
Wide or too long tracks will unnecessarily load the engine. Which, in turn, will complicate the control of a snowmobile on tracks in the snow. Too small a track will not be able to support the weight of the entire structure with the driver. It will become unstable and will fall through in loose and deep snow. For the manufacture of caterpillars, the simplest materials are used: a plastic or plastic pipe of small diameter, wheels, bearings.
Billets 0.5 cm long are made from the pipe, from which soil hooks are obtained. They are attached to the tape at the same distance from each other. Then they are fixed with bolts in the holes on the conveyor belt. The frame is made using square pipes or a channel. Use a tie rod without ball ends, since the axes of the steering wheel and skis lie in the same plane.
Bushings are fixed on the front of the frame to allow the skis to turn. They can be made from steel couplings with pipes and threads of small diameter. Ski racks and tie rods are welded to the nozzles. To control the snowmobile, corners with a metal undercut are attached to the skis, which will allow you to move on ice or snow crust.
The weight of such a snowmobile is not more than 100 kg, and it is very easy to control the vehicle. Since the motor power is small, the speed does not exceed 10-15 km / h, so the brakes are not provided. The end of the movement occurs due to the deceleration of the engine or the so-called engine braking.
A snowmobile allows you to move in deep snow with a driver and a small luggage on board. Most of the population cannot afford such equipment due to its high cost. Therefore, the possibility of creating a snowmobile based on a walk-behind tractor is very relevant.
How to make a caterpillar attachment to a walk-behind tractor
When they assemble a snowmobile with their own hands, they put special emphasis on the caterpillar track. Consider the features of homemade assembly: how to make a caterpillar attachment to a walk-behind tractor with your own hands.
Some craftsmen put parts from a walk-behind tractor or make them with their own hands, and for those who are unable to manufacture, they acquire a universal factory caterpillar drive. Homemade caterpillar can be made from:
- sleeve-roller chain and conveyor belt;
- tires;
- belts.
Often there is a home-made caterpillar attachment to the Buran series unit. In such a unit, the entire chassis, together with the engine, weighs 20-30 kg.
The SAM snowmobile attachment to the walk-behind tractor is produced only in Nizhny Novgorod. She goes on 3 rollers and is all-terrain. It can be driven on both snow and mud.
In order for the attachment to serve for a long time, it is important not to overtighten the tracks, as this leads to a break.
For a home-made snowmobile, there is also the prefix "CAM", only in this case it will be clearly necessary to know the shape and parameters of the gearbox shaft.
Caterpillar module for walk-behind tractor. Thanks to the wide tracks, this attachment moves easily in deep snow. It is suitable for the Neva, Oka, Tselina, Cascade, Luch motoblocks, and it can also be used on motor cultivators with some refinement of the seats. In the finished attachment, you can adjust the tension of the tracks, which stretch when moving.
Equally important is the driven part attached to the walk-behind tractor. This is the driver's seat and luggage space. In this case, you can use whatever comes to mind: a board, a stool, a sled, an armchair, etc. The only important condition when choosing is the waterproofness of the seat.
Ready-made caterpillar attachment for the Neva walk-behind tractor. There are universal caterpillar attachments on sale that are suitable for any mini-unit, including the Neva walk-behind tractor. They are easy to assemble and install. Very compact and does not take up much storage space. The optimal width of the tracks increases the throughput of the device. The risk of getting stuck in snowdrifts or mud is minimized. The undoubted advantage of ready-made caterpillars is their long service life and affordable price.
Do-it-yourself skiing on a walk-behind tractor
When making skis on a walk-behind tractor with your own hands, special attention should be paid to the material from which you are going to make this part of the snowmobile. It is not recommended to take plastic as a basis, as it has poor adhesion to snow. It is better to give preference to wood or plywood (at least 9 layers). Be sure to install metal undercuts, the thickness of which in diameter should be equal to 8 mm.
Masters with experience in assembling a snowmobile recommend using shock absorbers for a do-it-yourself walk-behind tractor. Without this part, the unit will move, of course, but with a shock absorber, the ride quality will improve much. You can remove this part from the frame of an old motorcycle, but it is best to purchase new shock absorbers.
The preparatory stage in the manufacture of a snowmobile
It is important to carefully review the drawings, which will prompt the sequence of mounting parts of the snowmobile.
Two manufacturing options:
- Wheel move. This design does not require much modification. A small trailer is hooked to the walk-behind tractor, prepared snowmobile wheels are put on;
- Crawler. The design is more complicated with the assembled frame and chassis. From the walk-behind tractor, in fact, only the engine and a couple of its spare parts are taken. The advantages of such a unit are in stability and increased cross-country ability, compared with wheeled models.
The snowmobile device includes two parts: driven (shock absorbers, skids, steering column) and leading (frame, drive, power device). During the development of a home-made project, it is worthwhile to determine in advance which parts of the structure will be made by hand and which ones need to be purchased.
At the initial stage, you need to acquire the necessary materials and equipment:
- welding;
- Pipe bender;
- Bulgarian;
- Erelyu;
- Wrenches and screwdrivers;
- Vise;
- fasteners;
- clamps;
- lathe;
- Pipes with a diameter of 1 centimeter;
- Sheets of steel with a thickness of 5 millimeters;
- Wheels.
You need to fold a snowmobile from a walk-behind tractor with your own hands in a dry, heated room, for example, in a garage. So adhesives and dyes will dry faster.
Snowmobiles from a walk-behind tractor on wheels
Consider how snowmobiles are made from a walk-behind tractor on wheels. Wheels for a homemade snowmobile should be powerful, as this ensures its own safety and easy control. Cameras from the Urals or KamAZ can be used.
There are several ways to create wheels yourself, which involve a metal base with a camera built inside. The main condition for creating an all-terrain vehicle on wheels is the equipment with 3 or 4 wheels.
When installing wheels for this snowmobile, low-pressure tires or tubes from large cars are selected. They are put on standard discs and secured with chains. The motoblock engine consumes little fuel, so the high autonomy of a snowmobile of its own production will allow you to travel long distances.
The advantage of a tracked snowmobile. In winter, caterpillar walk-behind tractors are much more preferable. A large coverage area contributes to the correct distribution of the load and pressure on the ground. The track attachment will never get stuck in snow or other unstable surfaces, which cannot be said about the wheels.
Descriptions of various designs of home-made caterpillar snowmobiles, as well as information (step-by-step manufacturing photos, videos, detailed drawings) on how to convert a walk-behind tractor into a winter goose all-terrain vehicle, can be easily found on the Internet. A video describing a snowmobile made by yourself can be viewed below.
Let's find out how much homemade snowmobiles from a walk-behind tractor cost. If you compare a finished snowmobile with a homemade one, then the difference in price will be significant. Homemade will cost 5 times cheaper. And if you have some parts in stock, then even less. As for the reliability of the machine, when making it yourself, the master approaches the choice of parts thoroughly, selecting the most reliable parts. The result is a powerful, passable design everywhere.
Consider the reviews of farmers and gardeners. People believe that it is advisable to create a snowmobile from a walk-behind tractor on your own, if only because the most primitive finished car costs between 3.5 and 5 thousand dollars. The price of the best models starts from 10 thousand dollars. Even purchasing new parts to assemble a snowmobile, the car is several times cheaper. On the forums, you can find a lot of positive feedback from people talking about their unforgettable feelings from riding snowmobiles assembled by themselves. They are happy to share their experience and knowledge with beginners who want to design a similar machine.
