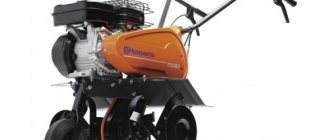
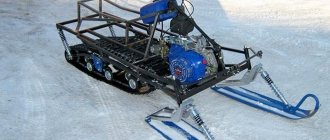
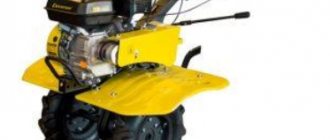
One of the devices designed to simplify human labor and make it more comfortable is a do-it-yourself cultivator for a walk-behind tractor. On the eve of the summer season, the issue of acquiring a variety of equipment for cultivating the land and collecting the appropriate equipment becomes immensely relevant. However, the purchase of new factory devices is associated with rather large material costs, which is not always justified, and in the conditions of a small land plot it becomes completely inappropriate. At the same time, hand-made products are an alternative to such expensive purchases.
The principle of operation of the cultivator and its main advantages
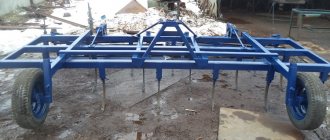
Each of us has at least once seen a cultivator attached to a tractor and allowing better cultivation of the fields. The design of the cultivator has not changed much since its inception. If we compare it with any other device, then it is several small plows connected to each other.
The similar structure of this device allows you to process only the top layer of soil, which is the most fertile. As a result, the areas exposed to the cultivator become the most convenient and are characterized by optimal yield qualities. This fact is due to the fact that the top layer of the earth, consisting entirely of chernozem, does not mix with other types of soil and retains its qualities.
Thus, the practicality and efficiency of the cultivator served as an impetus for its wide popularity. It has become popular with both farmers and amateur gardeners. The list of actions that can be performed using this device is truly amazing, since it forms almost a complete agricultural cycle. This list of functionality of the cultivator looks like this:
- soil plowing;
- weed control;
- loosening the soil;
- landscape leveling;
- application of mineral fertilizers.
The use of such a device can replace many garden tools and other household equipment. However, not everyone can use the services of a tractor or purchase this unit for personal use. In such conditions, some remain supporters of traditional methods of cultivating the land, while others try to design a cultivator on their own. It should be taken into account that making a homemade cultivator on a walk-behind tractor is not so difficult. The only difficulty that may arise in the implementation of such a solution is the concept of the principle of operation of the device and the availability of practical skills in working with it. It is these qualities that are key and allow you to create the most functional and practical device that can fully process the site and save energy for its owner.
How to make a flat cutter
Many are looking for a weed cultivator.
Such a weeding apparatus can be made independently. A profile pipe made of metal or steel is used as the basis for the frame. This base must be made of 2 parts. You need to weld at an angle of 30 degrees. A wheel fork is welded to the frame, made of a steel pipe or plate 3 mm thick. The wheel itself can be either made independently or bought. The steering wheel must be made of 2 steel pipes fixed to the frame. The horizontal part of the frame is an adapter for the cutting attachment. Then you need to mount a knife, which is made of a steel tape 2-3 mm thick. Next, the knives are sharpened. The sharpening angle can be changed or adjustable knives can be installed. If the farm has an old bicycle, then all spare parts can be taken from it. Due to the large diameter of the bicycle wheel, the movement becomes very easy when working. The knife is made in the form of an inverted letter "P", or T-shaped. It should be noted that the T-shaped knife must be used very carefully between the rows, as there is a possibility of spoiling the crop.
A special subspecies of the flat cutter is the design with forks. Such an apparatus has several knives that are mounted on a fork. It is made of steel rods, and they, in turn, are bent in a special way.
For such an apparatus, you also need to make handmade knives with your own hands. Drawings of these devices are found in various thematic forums and blogs.
The design has a fairly easy move. Both a fragile girl and a small child can work with such an apparatus. Loosening occurs at the highest level, but the roots of weeds are practically not cut off. To do this, you need to choose what is more important: high-quality loosening or removal of pests from the soil.
The main stages of creating a cultivator and the importance of their indispensable observance
How to assemble a cultivator on a walk-behind tractor with your own hands? This lesson is quite simple for those who have the skills to work with similar devices and understand their design. To further simplify the work, there is a certain structure, which implies the breakdown of the entire process into certain stages, different in their purpose and functional execution. These subsections look like this and in the best possible way characterize the entire procedure for creating a device:
- drawing up a plan for the future device;
- collection of the necessary tools;
- assembly of the device.
A homemade cultivator, assembled in accordance with these criteria, will have the best qualities and will become an indispensable assistant both at their summer cottage and in their own garden.
At the same time, a do-it-yourself device will be convenient and practical, since in the process of its assembly all parameters and design features should be performed based on your own anthropometric data, in addition, based on your own preferences and desires.
Description of the universal rotary cultivator Top Keeper
Important! You should choose equipment from the most reliable materials, only in this case it will serve the gardener for many years. The Top Keeper rotary cultivator has become widespread in consumer markets.
It has some distinguishing features from other rotary plows. It receives power from a removable battery, which is connected directly to the electric motor. The length of the rod, which provides the force of pressure on the ground, is changeable and adjustable, which ensures comfortable work. The width of the captured area of the treated area is 20 cm. The head of the equipment is equipped with 4 interchangeable knife structures made of high-strength material. Removable knife structures are good when the width of the cultivated soil should be reduced
The Top Keeper rotary cultivator has become widespread in consumer markets. It has some distinguishing features from other rotary plows. It receives power from a removable battery, which is connected directly to the electric motor. The length of the rod, which provides the force of pressure on the ground, is changeable and adjustable, which ensures comfortable work. The width of the captured area of the treated area is 20 cm. The head of the equipment is equipped with 4 interchangeable knife structures made of high-strength material. Removable knife structures are good when the width of the cultivated soil should be reduced.
In order for the cultivator trimmer to rid the area of weeds, it is necessary to deepen it a little into the upper soil layer. Thanks to sharp knives, weeds are quickly crushed. Another removable nozzle will allow you to accurately and efficiently cut lawn grass, leaving even hedgehogs behind, loosening the ground in some accessible places.
Lawn grass
Prices for this high-quality equipment vary. According to the characteristics, you can choose the unit that is most suitable for your own plot of land. Rotary cultivators from Top Keeper have established themselves as high-quality and indispensable equipment in agriculture.
Whatever cultivator the farmer chooses, it will greatly facilitate hard physical labor for him. With it, you can process 2 hectares of land 4-6 times faster than this processing would be done manually.
vote
Article Rating
Do-it-yourself cultivator: drawing up a diagram and a list of necessary equipment
How to make a cultivator with your own hands? The first stage, which requires detailed study and study, is the drawing up of a schematic diagram of the future device and a description of all stages of its assembly. To implement this part of the construction, it is required to draw up detailed drawings of the fixture, on which all dimensions and ratios of structural elements must be indicated.
This can be done both with the help of special computer programs, which allows you to visually display the visual model, in addition, set all the necessary parameters for it, or use the traditional method. It consists in drawing drawings of all parts on graph paper, on which it is also necessary to indicate all other parameters and aspect ratios. Each of these options is able to fully transfer all the necessary information that is required in order to quickly and easily create a homemade cultivator on a walk-behind tractor.
After carrying out work aimed at creating a visual image of the future device, we proceed to the collection of the necessary tool. The list of inventory that will be needed to carry out the work looks quite impressive and requires its full compliance. Otherwise, the lack of any tool is fraught with delays in work and the impossibility of performing one or another unit of the device. Therefore, it is extremely important to prepare in advance all the necessary tools and parts, which will not only significantly save time, but also perform the entire sequence of work most efficiently. As for the list of necessary equipment itself, it looks like this and in the best possible way emphasizes all the different planning of work and their importance. So, a homemade cultivator and its creation requires the following tools:
- welding machine;
- drill;
- a set of keys;
- sledgehammer;
- Bulgarian;
- metal scissors;
- roulette;
- Screwdriver Set;
- hammer;
- pencil.
The above tools will allow you to create a device with optimal characteristics and do it in the shortest possible time. A separate point needs to be said about the methods of attaching parts to each other. To date, there are only two of them. Metal bolts and welding - both of these methods of fixing metal parts are absolutely reliable. However, it is better to assemble a home-made cultivator on a walk-behind tractor with bolts, because due to the constant vibration that will accompany the operation of the device, welds can quickly become unusable. The most critical parts of the structure should be fixed with bolts, while the auxiliary parts of the system may well be connected by welding.
Recommendations for choosing a motor cultivator
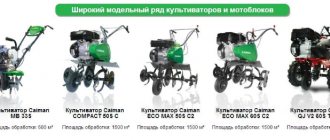
When choosing a cultivator (manual, disc, automatic), it is recommended to consider:
Appointment. If the plot area does not exceed 25 acres, then you can choose a conventional manual or electric cultivator. For large areas and complex work, a walk-behind tractor will be the best solution; Appearance. When buying, carefully inspect the equipment for defects (scuffs, deformations, streaks, chips, cracks). There should be no visible flaws; Brand. The cost of equipment depends on the manufacturer. High-quality equipment with reliable assembly has a corresponding price. By purchasing a branded product, the client has the opportunity to receive free after-sales service, a guarantee is issued for the product; Serviceability. Be sure to check the equipment in the store for the functioning of components and assemblies. The motor should start and run easily, the shafts should rotate. The throttle and clutch cables should move easily. The presence of creases and scuffs is not allowed; Build quality
During external inspection, pay attention to the fasteners of bolts and nuts. There should be no untwisted or loose parts
When the device is turned on, all components must work and move without creaking or jerking; Documentation. A quality product must be certified, it must have a technological passport and instructions; Individual characteristics. If the cultivator is purchased for personal use, then it is necessary to evaluate your own physical capabilities. Women and teenagers will not be able to work with heavy aggregates.
The final stage of creating the device is the assembly of the cultivator
How to assemble an inter-row cultivator?
The arrangement of all parts and their connection to each other is the final stage in the creation of the device, since its functionality depends to the greatest extent on the accuracy and correctness of these procedures.
What can we say, many hand-assembled garden cultivators and walk-behind tractors do not have the best parameters. In most cases, the fault in such a situation is by no means the quality of the selected materials, although this criterion is also very important, but the incorrect assembly of the fixture. Therefore, every detail, detail and step must be clearly calibrated, since this is the only way to achieve the desired result and get the device that is optimal in terms of its characteristics.
The principle of connecting parts is quite simple and consists in fastening to a frame, on which several movable sections are successively fixed. It is they who will act as plows and form our inter-row cultivator. In this case, the frame is fixed to the walk-behind tractor with bolts, and all other crossbars and corner elements are welded to it. Absolutely any metal structures can act as the plows themselves, which are fixed in the grooves of the movable carts. Their main criterion is a pointed shape and relatively small dimensions. The moving elements themselves are fixed to the frame with bolts that allow you to adjust the distance of the plows from each other and guarantee their secure fixation.
Loosening potato rows with a walk-behind tractor
To use a walk-behind tractor for loosening the soil, potatoes are initially planted according to the appropriate parameters:
- distance between rows - 70 cm;
- the longest rows;
- at the edges, there must be room for turning the unit.
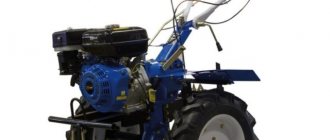
Loosening is combined with the first hilling, it is carried out 15 days after planting potatoes. To do this, use a plow-hiller or disk attachments. In order for the walk-behind tractor to better engage with the ground, it is recommended to replace conventional wheels with metal ones with lugs.
If loosening is done by a hiller, a universal hitch is hung on the walk-behind tractor, installing one or more hiller plows on it.
When using disk nozzles, it is necessary to adjust the angle of rotation and the distance between them. The distance can vary from 40 to 70 cm, it all depends on the variety of potatoes and the height of the bushes. The angle of rotation depends on the density of the soil.
See also
Description of varieties of black potatoes, features of cultivation and careRead
