How to choose a generator for a walk-behind tractor?
It can be quite difficult for a novice farmer to choose the right generator for a walk-behind tractor.
However, not everything is as complicated as it might seem at first glance. The only and most important factor to pay attention to is the power of the device. Whatever generator you choose for an agricultural machine, its power must necessarily exceed the total power of the loads under which the walk-behind tractor operates. This will allow the device to work properly at a voltage of 220 volts without the risk of surges in the electrical network, and power all the electrical appliances on the walk-behind tractor.
Often, inexperienced owners of walk-behind tractors acquire and equip their equipment with generators designed for installation on cars. This is the best option in cases where a powerful heavy-duty walk-behind tractor is regularly used on the farm. In other cases, it is impractical to buy such generators because of their high cost.
Features of choice
When choosing an electric generator, the main thing, as noted above, is its power. The power value you need is easy to calculate on your own. To do this, it will be enough to sum up the power of all the devices of the walk-behind tractor and purchase a generator that is of greater importance than this number. It is in this case that you can be sure that the walk-behind tractor will be able to provide energy to all devices without jumps and interruptions. The standard voltage for generators is the same 220 volts.
It is worth thinking about purchasing a car generator only if there is a regular, almost daily use of a walk-behind tractor.
In some cases, it is recommended to purchase such an electric generator on a model of heavy-duty walk-behind tractors. But it is best not to buy such models because of the exorbitant cost of some copies in order to avoid the same expensive subsequent repair of the product.
How to put a generator on a walk-behind tractor - the algorithm in detail
Before installing the generator on an agricultural unit, you should study in detail the structure of the existing element. The generator for the walk-behind tractor consists of the following parts:
- case - in most cases it is presented in the form of a metal box equipped with a front and back cover;
- pulley - this part is designed to transfer mechanical energy from the motor to the generator shaft through a belt;
- stator - the role of this part is played by the usual rewinding of steel sheets assembled in one compact package. In its shape, the stator resembles a pipe, inside which the power of the generator is generated;
- rotor - this part has the form of a steel shaft equipped with two metal bushings. In the area between the bushings there is an excitation winding, the wires of which are connected to slip rings;
- the brush assembly is a plastic part responsible for the correct operation of the generator;
- voltage regulator - this part is responsible for stabilizing the voltage when the load level on the generator changes.
Do-it-yourself installation of a generator and walk-behind tractor takes a lot of time, but by spending it, you will ensure the smooth operation of your agricultural machine. It is necessary to connect the generator to the unit in compliance with the electrical diagram, which contains and describes all the connections necessary for installation.
How to choose an electric motor
To eliminate errors at the design stage, it is necessary to pay attention to the design of the purchased motor, as well as its electrical characteristics: power consumption, supply voltage, rotor speed. Asynchronous machines are reversible
They are able to work in the mode:
Asynchronous machines are reversible. They are able to work in the mode:
electric motor when external voltage is applied to them;
or a generator, if their rotor rotates a source of mechanical energy, for example, a water or wind wheel, an internal combustion engine.
We pay attention to the nameplate, the design of the rotor and stator. We take into account their features when creating a generator
What you need to know about the design of the stator
It has three isolated windings wound on a common core of the magnetic circuit for power supply from each phase of the voltage.
They are connected in one of two ways:
1. A star when all ends are collected at one point. Voltage is applied to the 3 beginnings and the common terminal of the ends through four wires.
2. Triangle - the end of one winding is connected to the beginning of the other so that the circuit is assembled in a ring and only three wires come out of it.
This information is presented in more detail in the article on my website about connecting a three-phase motor to a household single-phase network.
Rotor design features
It also has a magnetic circuit and three windings. They are connected in one of two ways:
1. through the contact terminals of a motor with a phase rotor;
2. short-circuited with an aluminum insert in the squirrel wheel design - asynchronous machines.
We need a squirrel-cage rotor. All schemes are designed for him.
The design of the phase rotor can also be used as a generator. But it will have to be redone: we simply shunt all the outputs between ourselves with short circuits.
Generator Wiring Diagram
When installing and connecting the generator, it must be remembered that an incorrect connection of the electrical circuit will cause a short circuit in the generator winding. To prevent this, you must connect the device strictly according to the instructions in the algorithm below:
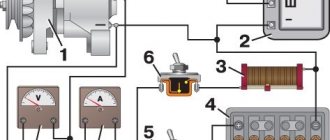
- Connect the generator to the electronic unit of the agricultural machine using two wires. The block itself is equipped with 4 wires, 2 of which are blue - connect the energy converter to them;
- After that, you will be left with a black and red wire. Connect the first of them to the mass of the motoblock engine;
- The red wire is responsible for the output of the converted voltage, which is required to provide power to all electrical appliances of the walk-behind tractor without a battery - headlights and a sound signal. If the generator is installed on a walk-behind tractor with a battery, then the converted energy is supplied to the battery and the electric starter of the unit. The video will tell you more about connecting the generator to the walk-behind tractor.
How to make a generator on a walk-behind tractor - just about the complicated
Making a generator for a walk-behind tractor with your own hands is quite simple if you follow the correct procedure. To work, you will need an electric motor, which must be installed on an agricultural machine. The generator manufacturing algorithm is as follows:
- First you need to install an electric motor on the frame of the walk-behind tractor. It is best to use a prefabricated frame for this, screwed to the frame of the unit with screws. Place and fix the electric motor in the frame in such a way that its shaft and the shaft and the shaft of the standard walk-behind tractor motor are located strictly parallel to each other;
- Next, you need to install 2 pulleys - install one of them on the shaft of the gasoline motor of the walk-behind tractor, and the second on the shaft of the electric motor used. An important role for the correct operation of the entire system is played by the correctly selected diameter of the pulleys used - the frequency of rotation of the electric motor depends on these dimensions. In order for the generator to work without failure, the diameter of the pulleys must be equal to the nominal diameter, which is indicated on the packaging of these parts. Even better, if the actual diameter of the pulleys is 10% larger than the nominal;
- Having finished the mechanical assembly of the generator, you can proceed to connecting it to the walk-behind tractor. To do this, use the wiring diagram above.
A homemade generator from an electric motor does not require special care. However, in order to extend the life of the device, a number of rules should be followed.
When operating a walk-behind tractor, pay attention to the following nuances:
- if you find that the electric motor installed on the walk-behind tractor has become very hot, then replace the standard motor capacitors with elements with a lower capacity;
- the voltage of the capacitors installed in the electric motor is of great importance. Capacitors with a voltage of at least 400 volts are considered the best option for operation. If this figure is lower for standard motor capacitors, then replace them with suitable elements;
- try to operate the walk-behind tractor with a generator installed in dry weather, since moisture that can get into the electric motor will inevitably lead to a short circuit inside the electrical system.
By adhering to the above rules, you will prevent the breakdown of a home-made generator and significantly extend its life.
The methods listed above are suitable for the manufacture and installation of generators on Neva walk-behind tractors, as well as agricultural machines of other domestic and foreign equipment manufacturers.
Assembling a gas generator with your own hands
To create do-it-yourself power generators for 220 at home for the purpose of domestic use, a number of measures must be taken. To begin with, a diagram is drawn up and, according to it, they are determined with the details and assembly order.
List of main parts
To assemble a 220 V electric generator with your own hands, you must first select all the main parts that make it up.
- It is very rare to find a 220 volt generator without an engine. You can assemble it yourself. But in this case, the whole process will take a lot of time. To shorten the generator manufacturing procedure, the engine can be borrowed from failed equipment. The best options are engines from washing machines, pumping stations, walk-behind tractors, chainsaws. For more powerful ones, you can remove the car engine.
- Electric starter. It is advisable to use a finished part that has a winding.
- Electric wires and insulating tape.
- To achieve a stable supply of electricity, it is necessary to use transformer or rectifier structures. This is relevant in cases where, as a result, they receive electricity with different capacities. With the help of a transformer, you can increase or decrease the power.
Assembly principle
After all the components are found and prepared, they proceed directly to the assembly of a home-made 220 V alternator. The principle consists of several stages.
- Initially, it is necessary to calculate the power of a home-made power plant. To do this, the engine is connected to the mains and the number of rotations is determined. A special device called a tachometer will help to perform calculations. The result obtained must be increased by 10%, which are allocated for load compensation. It will be able to prevent the engine from overheating during operation.
- The next step is to select capacitors. In this case, it is necessary to take into account the power for which the generator is designed. Special tables that are in all regulatory documents, SNiPs and GOSTs can help in this process.
- An important point is grounding. Since they are dealing with electricity, its absence can lead to a traumatic situation. In addition, without grounding, the operating time of the device is significantly reduced.
Homemade 220 V alternators are quite easy to assemble. The prepared parts are interconnected in the following sequence: capacitors are connected to the engine, as indicated in the diagram
Pay attention to the fact that the capacitance of each subsequent capacitor is the same as that of the previous one.
Nuances in use
The considered option is very simple both in assembly and in use, but has certain shortcomings:
- It is necessary to constantly monitor the temperature of the engine, since it should not be allowed to overheat.
- The duration of work is insignificant: the more the generator works, the less its power becomes. Therefore, periodically give the opportunity to make a homemade power plant to rest. The optimum engine temperature is 40-45 degrees.
- The absence of automation will require the presence of the user during operation. It will be necessary to take various indicators and control the process.
Electric generators can run not only on gasoline. Any energy resource is suitable for them, for example, firewood or a wind turbine. But the power of such devices is insignificant, and the resources themselves will need quite a lot, which becomes costly.
Motoblock generator
The generator for a walk-behind tractor is one of the most important elements; it supplies electricity to the headlights and recharges the battery. The battery is an autonomous power source, it is necessary, first of all, for the walk-behind tractor to start without any special difficulties thanks to the starter, and to feed electrical appliances in the future. The main function of a 220 volt generator is to convert mechanical energy into electrical energy.
Mounting the device on a walk-behind tractor
Many people ask themselves the same question, how to install a generator on a walk-behind tractor without a battery? In order to install the device with your own hands, it is advisable to follow some rules and know what the device consists of.
- The hull is a steel container.
- Pulley - is a conductor of mechanical energy.
- Voltage regulator.
- Rotor - a shaft made of steel and two bushings, between which there is a winding.
- The brush assembly is made of plastic and occupies an important place in the proper functioning of the generator.
- The stator is a classic rewind, power is generated inside it.
How to install a generator on a cultivator
Consider how the generator is installed on the walk-behind tractor with your own hands. This is a simple task, and a person who understands electricity can handle it. A 220 volt generator is needed in order to supply the light bulb and headlights with electricity. It is also used to charge the battery, which, through the starter, turns on the engine and then charges all electrical devices.
The generator for the walk-behind tractor must be selected correctly, taking into account the technical characteristics and features of the cultivator. It is necessary that the power of the mechanism corresponds to the required load. It won't always be 220V.
For a cultivator, a device from a tractor or car is suitable.
You can also take a mechanism from a walk-behind tractor that has already failed or is not used in work. If during the operation of the equipment the mechanism functions normally, there are no voltage drops, then we can conclude that a suitable generator has been installed.
Let's figure out how to install a generator on a walk-behind tractor. It's easy to do it yourself. In this case, you must strictly follow the instructions and know what parts the device consists of. Components of the generator:
- frame;
- pulley;
- voltage regulator;
- stator;
- brush knot;
- rotor.
The body is a block of metal. The pulley is designed to transfer mechanical energy to the shaft. The voltage regulator is designed to maintain the same load when voltage fluctuations occur. The power of the cultivator is created inside the stator.
The brush assembly is a plastic device that helps the mechanism perform all functions correctly. The rotor is a steel shaft with 2 bushings, between them there is an excitation winding.
With self-installation, you can take a 220 V generator from the car for the cultivator. If you connect it incorrectly, the winding will light up. There are 4 wires in the block, 2 of them are blue. With their help, connect the converter. The voltage is output using a red wire that charges the battery and powers the headlights. The black wire is connected to the engine system. It transmits torque to the rotor when starting the engine. At the same time, the generator supplies a certain load to the electrical unit.
Starting the engine reduces the capacity of the battery, i.e. all devices will take power from the electrical box. Then the battery charge is restored, and the supply of electricity to the devices will again come from it.
Homemade generator from a walk-behind tractor
Many people experience power outages in residential areas, and this is not uncommon. Someone is saved by traditional methods, using candles, gas generators, etc. But there is another solution to the problem: a do-it-yourself electric generator made from a walk-behind tractor, capable of generating electricity. For this, an asynchronous electric motor is useful. The speed is 800-1600 per minute with a power of up to 15 kW. It is connected by means of a drive belt and pulleys to a motor removed from a motorcycle. In order for the motor speed to be 15% higher than the technical value, it is necessary to select a pulley with a suitable diameter. We combine the motor windings with a star, in turn, the capacitor is connected in parallel to each of them. A triangle comes out. For proper operation, it is imperative to have the same capacity for all generators. You need to create a generator according to the following video instructions:
Do-it-yourself minitractor from a walk-behind tractor. Do-it-yourself mini tractor from a walk-behind tractor
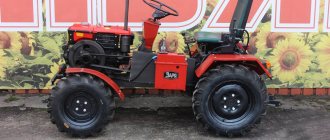
For processing small plots of land, there is no better solution than a do-it-yourself mini tractor from a walk-behind tractor. Not every site owner can purchase a factory-made model, so other solutions have to be found. It’s easier, for example, to buy an ordinary walk-behind tractor and remake it only on your own.
Necessary tools and materials
The first stage of work consists in drawing up a drawing and preparing equipment. A scheme of nodes and mechanisms, if you have the appropriate skills, can be developed independently or you can use those presented below.
As for the components, ready-made factory conversion kits are suitable - in any case, they are cheaper than the mini tractor itself. But this option is only suitable for those who do not want to save on absolutely everything.
Creating a homemade tractor will become impossible without:
- Bulgarians and disks.
- Fasteners and hardware (bolts and nuts).
- Channels and pipes with a metal base.
- Drill that comes with drill sets.
- Equipment for welding.
- Set with tools.
You can not do without two suitable wheels, along with a hitch and a driver's seat, steering gear, pedals, the walk-behind tractor itself. It must have sufficient power.
A heavy class of motoblock with diesel fuel is ideal for a homemade mini tractor.
Examples of drawings of mini tractors
Overall dimensions of the mini-tractor
Layout drawing of the mini-tractor "Ant"
Kinematic diagram of a minitractor
Choice of walk-behind tractor
Of the important parameters for these devices, it is worth highlighting:
- Cost and manufacturer.
- Plow size (if the mini tractor will be used for plowing the land).
- The type of engine used.
- Weight.
- Power level.
Power. One of the most important parameters, since the performance and strength of a mini tractor directly depends on engine power. The more aggressive and heavier the load on the transport, the more powerful you need to take the walk-behind tractor.
Weight. If a homemade mini tractor will be used for plowing the land, then the weight of the walk-behind tractor will be a critical parameter. The defining moment is the type of cultivated land: for hard soils, you should not choose too light walk-behind tractors, otherwise the mini tractor will not cope with its purpose.
Although gasoline walk-behind tractors are much quieter, diesel wins in terms of efficiency of its use: it has stable speed and increased traction. With heavy soils and large areas, it is the diesel engine that will do better.
In any case, for any purpose, the heavier the walk-behind tractor, the better the performance data of the future mini tractor.
Price and manufacturer. If possible, it is better to choose products from companies that have been on the market for a long time. If financial opportunities are limited, you can get by with cheaper analogues. Russian products will also be the best option for most.
Chinese walk-behind tractors
Basically, these are copies of Russian models. Their cost is lower due to lower production resources and savings on materials. This somewhat negatively affects the final product quality.
At the same time, the functionality does not differ from Russian walk-behind tractors. Recently, products of acceptable quality have appeared, although they are still far from analogues from Russia. Popular Chinese walk-behind tractors include the Bison, Farmer, Centaur, Forte, Aurora, Zirka and others models.
Russian products
The best solution at an affordable price. Motoblocks with a belt drive or with a transmission with the ability to transmit torque to, or, have gained popularity among buyers. In any case, the process is not complete without the participation of a special belt.
A feature of our developments is the simple arrangement of the clutch system. Of the maintenance procedures, only the replacement of the belt remains. Even Soviet engineers designed a gearbox, which is recognized as one of the most successful on the market. Professional engines of foreign manufacturers are used. The units are functional and reliable.
Installing a generator on a walk-behind tractor with your own hands
The generator for a walk-behind tractor is a key element of the electrical circuit of the unit, without which the normal operation of the battery and headlights is impossible. It is he who charges the battery, thanks to which the unhindered planting of equipment with a starter is made and all the electrical mechanisms on board are powered during operation. The principle of its operation is quite simple: mechanical energy is converted into electrical energy. The design is also not complicated.
But, there are some nuances in its selection and installation, without which it will be impossible to ensure the efficient and uninterrupted operation of the machine as a whole.
Do-it-yourself minitractor from a walk-behind tractor. What will be required
Before starting work, you should make sure that you have all the necessary parts, materials, and tools.
So, what is required for work:
- Motoblock. It must be chosen taking into account the above recommendations. It is he who will serve as the basis in a homemade mini tractor.
Motoblock Neva - the best option for rework
- Additional wheelset with axle. It is necessary to purchase bearings for the wheels, as well as a steering unit.
- Metal sheets, branch pipes and corners. The material is needed to create the body and frame structure.
- Elements for fixing parts and mechanical units. In this case, washers, bolts, nuts, welding are used.
For assembly, in addition to parts, you still need to prepare a number of tools:
- welder;
- drill driver;
- a set of wrenches of different sizes;
- pliers;
- Bulgarian.
How to correctly choose a generator for a walk-behind tractor?
The standard and most versatile option is considered to be 12 volts, and you can choose either one specially released by the manufacturer as an additional accessory for a particular model of walk-behind tractor, or any other, including those used with another tractor or car. The main thing is that its power should be greater than the load installed as a whole, since it will need to work without power surges, even if absolutely all electrical appliances of the equipment are involved at the same time. Otherwise, the desired characteristics are calculated based on the planned scope of work, affordability and ease of maintenance, as well as repair of the device.
Do-it-yourself minitractor from Zhiguli. How to make a mini-tractor from Zhiguli with your own hands
Consider how to make a homemade tractor from a VAZ, what materials and tools you will need. First of all, you need to complete the drawings and diagrams of all structural units. To make a mini tractor with your own hands, you need the exact dimensions of the parts and calculations. Each component must be listed separately. And you need a drawing with a tractor assembled. It depends on the diagrams and drawings made, what will be a home-made tractor with a VAZ 2106 engine.
When working on a drawing, the following points should be considered:
- it is necessary to determine the location of the gearbox;
- the engine must be covered with a protective casing;
- where will the fuel tank be installed;
- if you shorten the tractor frame, then a home-made mini tractor from the VAZ will consume less fuel;
- front suspension should be reinforced.
How to make a generator on a walk-behind tractor?
In addition to buying a finished product, or using another one available on the farm, you can acquire such a necessary current source in another way: with the help of your own hands and a little knowledge in electrical engineering. For example, if there is an old, already unused, but still fully operational Neva walk-behind tractor, it is worth taking its parts to assemble a new design. First you need to choose a reliable frame of sufficient size, on which the generator and the walk-behind tractor removed from the equipment are located, and it is important to follow the parallel arrangement of their shafts. Rotation to the generator will be transmitted by special pulleys, while one of them must be installed on the gasoline motor shaft, and the other on the generator shaft. It is very important to correctly select the diameter of the pulley, because the speed will depend on it. It is best that it corresponds to the nominal value in the equipment passport, although deviations within 10-15% will not become a problem. After installing the pulleys, they are connected by a belt, and at this point the mechanical assembly stage can be considered complete. True, if in the future you are going to use the generator not only for a new walk-behind tractor, but also for other purposes, it is better to immediately assemble a full-fledged mobile version without or with a battery.
Other generator designs
The petrol option is not the only one. There are many ways to make the motor shaft rotate. For example, using a windmill or a water pump. Not the simplest designs, but they allow you to move away from the consumption of energy in the form of gasoline.
For example, it is also easy to assemble a hydrogenerator with your own hands. If a river flows near the house, its water can be used as a force to rotate the shaft. To do this, a wheel with many containers is installed in its channel. With this design, it is possible to create a flow of water that will rotate a turbine attached to an electric motor shaft. And the larger the volume of each tank, the more often they are installed (the number increases), the greater the power of the water flow. In fact, this is a kind of generator voltage regulator.
Read also: How to choose the right iron for your home
Wind generator diagram
With wind generators, things are a little different, because wind loads are not constant values. The rotation of the windmill, which is transmitted to the shaft of the electric motor, must be regulated, adjusting to the required value of the rotational speed of the electric motor shaft. Therefore, in this design, the voltage regulator is a conventional mechanical gearbox. But here, as they say, a double-edged sword. If the wind reduces gusts, a step-up gearbox is needed, if, on the contrary, it increases, a reduction gearbox is needed. This is the complexity of the construction of a wind power generator.
How to put a generator on a walk-behind tractor without outside help?
An existing generator is easiest to install by first watching the corresponding videos.
If this is not possible, you should use the scheme below.
This electrical circuit suggests connecting the generator to the walk-behind tractor using two blue wires (there will be four in total on the block, but only the indicated colors are suitable for the current source). The remaining red wire is responsible for the output of the converted voltage - it goes to the headlights and the signal, and also charges the battery. And the black wire is connected to the mass of the motor. The installation of the generator on the walk-behind tractor is completed without fail by checking with test equipment (multimeters, testers or avometers) first the circuit, and then the equipment as a whole in different operating modes.
Homemade mini tractor with generator
Dear visitors of the site " Samodelkin friend ", today we will consider detailed step-by-step instructions for assembling a home-made mini-tractor with our own hands. A mini-tractor is an excellent assistant in the difficult working days of a rural resident, with its help you can plow and cultivate a land allotment, transport various goods on a makeshift trailer, also mow grass with a mower in the summer, and clean the snow with a shovel-blade in winter.
To assemble the mini-tractor, components were taken from Domestic cars, namely the Moskvich-2140 checkpoint VAZ front hubs, NIVA rear wheels, front wheels from agricultural equipment. Sadko GE-390 four-stroke engine with overhead valves (air cooling) Tank capacity 6.5 l. Steering from a Muscovite, the brake system is installed on the rear wheels. Also on the tractor there is a generator borrowed from the 412th Moskvich current strength 40 A voltage 14 V battery 7 A. This generator feeds the tractor lighting system, namely two headlights, turn signals and a brake light.
materials
- Sadko GE-390 engine
- professional pipe
- Checkpoint "Moskvich"
- rear wheels NIVA
- Bridge "Moskvich"
- VAZ hubs
- Steering "Moskvich"
Tools
- welding inverter
- angle grinder (Bulgarian)
- drill
- set of wrenches
Do-it-yourself step-by-step photo of assembling a mini-tractor.
Source
Possible problems and solutions
A serious breakdown, of course, cannot be solved without contacting a service center or professional repairmen. But with the current simple ones it is quite possible for everyone to cope on their own. Among the most common user complaints, the following should be noted:
Otherwise, it is obvious that the installation of a walk-behind tractor generator is by no means difficult. Moreover, in this case, there is a chance to significantly save on it, as well as to remain fully confident that it was made really high quality, with strict adherence to all norms and recommendations. Of course, this process will not be easy for beginners without experience with an electrician, but, what pleases, the acquired skill will be useful in the future.
