Types of snowmobiles and parts for them
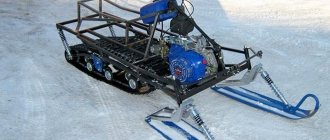
Before you buy a snowmobile or make one yourself, it is important to decide what kind of task it will perform. All machines of this type are divided into the following types:
- mountain;
- tourist;
- sports;
- utilitarian;
- children;
- mini snowmobile.
As a rule, they differ from each other not only in size, but also in the width of the caterpillar, which is the leading one. Most often on the market there are snowmobiles with two skis in front, which are attached to one suspension, it can be lever or candle. They differ from each other as follows: the lever system is designed for easy control, but in the forest it can break from any stump, the candle is worse in control, but much more resistant to shock.
Among Russian snowmobiles there are models with one ski in front and two tracks in the back. Such machines are suitable for driving on the highway, and for maneuvering in the forest. It is bad that with increasing speed they lose control. Models from different manufacturers may vary in width and shape.
Factory parts are standardly made of reinforced plastic. There are also metal skis. [ads-pc-1]
Chainsaw snowmobile
Advice. The snowmobile can be made both caterpillar and ski.
Before proceeding with the manufacture of a snowmobile from a chainsaw, it is necessary to select equipment that will have all the necessary characteristics. The best option for this purpose is the Friendship, Ural and Calm chainsaws (the power of these tools is ideal for creating high-speed snowmobiles).
Important! The engine and gearbox are the main parts of the chainsaw that are used in the process.
The design of the snowmobile consists of four parts:
- Caterpillars.
- Transmissions.
- Engine.
Ural chainsaw The assembly
of a home-made snowmobile is not carried out according to some proposed scheme or standard drawing, but based on the materials and tools that the master has at his disposal.
Instructions for assembling a snowmobile from a chainsaw
Assembling a product is quite an interesting job. It consists of several sequential steps that must be carried out carefully and responsibly.
- The first stage is the assembly of the frame base of the future homemade snowmobile. For work, you will need steel corners (size - 50 x 36 cm) or steel sheets (thickness - at least 2 mm). From the corners they make the middle part of the structure, and from the sheets - the front and back.
Advice. To give the necessary rigidity to the structure, the metal is bent at an angle of 90 degrees.
- Carefully make two through holes for the placement of the caterpillar shaft and the guides of the caterpillar wheels (tensioners are installed on both sides of the spars).
Important! The front device is specifically designed to tension the second stage idler, it also helps in adjusting the track itself.
- Special brackets are carefully welded to the lower part of the spars (they are fixed at the same distance from each other), and road wheels are installed in their open grooves.
- The rollers (in rubber covers) are placed on five axles, each of which is mounted on the underside of the open grooves.
- Between each of the elements, special duralumin bushings are installed (they are made from a suitable pipe).
Advice. In order not to waste time making rollers and axles for them, you can borrow them from old equipment for digging potatoes.
- The axles of the brackets themselves are fastened with nuts and locknuts (they are designed to reinforce the snowmobile frame, hold the spars at a certain distance from each other).
- Of the three metal corners, racks are made for mounting the prepared chainsaw gearbox, and an intermediate chain drive shaft is installed.
- A seat for the user is installed on the prepared frame (for this purpose, a suitable box or car seat is used), it is fixed in the area between the middle and rear parts of the structure.
Chainsaw snowmobile
- A hole is made in the front section of the frame to accommodate the steering wheel, it is made of a pipe with welded control knobs.
- Metal scarves are installed at the points of attachment of the snowmobile racks (they strengthen the structure, make it more durable and reliable).
Important! In order for the future home-made snowmobile to have good cross-country ability on snowy terrain, it is equipped with a caterpillar mechanism.
- A snowmobile drive shaft is made from a metal pipe, a special round flange is inserted into it for mounting gears.
- To create the steering, equipment from old motorcycles or mopeds with three-lever control is used.
The finished snowmobile is lightweight and can be easily placed in the trunk of a car for transportation over long distances. Its control is so simple and clear that even a child can easily use it.
How to properly change snowmobiles
In some cases, the purchased machine requires the replacement of skis. This can happen for several reasons:
- breaking;
- snowmobile upgrade.
More often you have to change when it breaks. When replacing in the event of a breakdown, you can upgrade the snowmobile (or mini snowmobile) with specially selected ski models. To do this, you need to know exactly which set of fasteners you need. It is not always necessary to upgrade a snowmobile with new skis. Sometimes owners can easily get by with details such as overlays (extenders).
For any car, you can choose your options. There are three types of ski extensions:
- for metal models;
- for plastic models, they have a groove along the entire surface;
- pads are universal.
It is not always possible to pick up expanders the first time. Sometimes they don't fit the ski. If the problem is that there is a small gap or does not match the bend, then it is easily solved by hand. Some extensions are designed specifically for riding in the woods. By installing them, you can enjoy special cross-country ability and driving on loose snow.
Features and benefits of homemade snowmobiles
The basis of the design of the winter vehicle is a caterpillar drive and steering skis. Of all the advantages of homemade snowmobiles over factory models, the following can be distinguished:
- The price of motorcycles assembled from improvised materials is 5-10 times lower.
- The ability to assemble a model of the desired configuration, power, etc.
- Reliability of a design, thanks to use of qualitative materials and the checked mechanisms.
- The benefit is that you can not buy new materials and parts, but use those stored in the garage.
A homemade snowmobile is a vehicle that can be found not only on country roads and ski resorts, but also on the streets of settlements.
Making a snowmobile according to drawings
How to make a snowmobile with your own hands, what parts and assemblies will be needed? To create a homemade tracked vehicle for moving through the snow, a list of necessary components is compiled, a sketch is made and drawings are made. In the future, they will serve as a guide for the creation of the TS.
The standard design consists of several elements. It includes:
- A frame that can be borrowed from an ATV, scooter, scooter, motorcycle, etc. If this is not possible, it is made by welding from thin-walled metal pipes with a diameter of 40 mm.
- The seat is preferably made of water-repellent material.
- The engine can also be from a walk-behind tractor, motorcycle, scooter, etc. The choice is determined by the speed and weight of the vehicle.
- A tank, which is a container of 10-15 liters made of metal or plastic.
- Skis on a homemade snowmobile on tracks can be taken ready-made or made from nine to ten plywood, 3 mm thick.
- The steering wheel, like many other elements, is taken from a two-wheeled unit.
- A drive that transmits rotational movements from the engine to the track, which can be used as a motorcycle chain.
- The caterpillar is a complex component that requires detailed consideration.
How to make caterpillars with your own hands?
Homemade tracks can be made from car tires. The advantage of using tires is that they have a closed circuit, which reduces the chance of a break. To make a caterpillar, the tire bead is cut off with a sharp shoe knife. Grousers are attached to the remaining flexible web, which are plastic pipes, 5 mm thick and 40 mm in diameter, sawn in length. The halves of the pipes are cut along the width of the tire, fastened with bolts every 5-7 cm.
Similarly, caterpillars are made from a conveyor belt. Its advantage is that in the case of its application there are no restrictions on the length. But there is a need for coupling by applying the ends of the tape with an overlap of 3-5 cm and fixing with bolts. In the manufacture of caterpillars with their own hands, V-belts are often used. Connected by lugs, they represent a full-fledged caterpillar with ready-made cavities for gears.
The wide caterpillar improves the patency of the unit, but reduces its controllability. The factory models have three options:
- Standard - 15;
- Wide - 20;
- Ultra wide - 24.
The sequence of creating a snowmobile with your own hands
To make a snowmobile on tracks with your own hands, you first need to connect the frame and steering gear. The height and angle of inclination are selected, then spot welding is performed. In accordance with the drawing, the engine is installed and fixed. It must be ensured that there is no strong slope. To avoid a long fuel line, the tank is located close to the carburetor.
Next, the caterpillar is installed. The driven axle with the canvas is attached behind the frame (depending on the design, on a suspension, fork, shock absorber, etc.), the drive axle is attached in the middle of the snowmobile (usually under the driver's seat), closer to the engine. The clutch of the gears of the bridges is preliminarily made. After that, the fuel tank, the throttle and brake cable are connected, the seat is mounted, and other work is carried out.
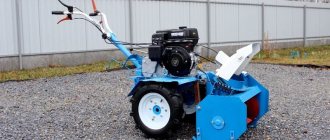
Do-it-yourself snowmobile from a walk-behind tractor
Creating a snowmobile from a walk-behind tractor is the most popular option. A vehicle intended for agricultural work may be used in whole or in part. It should be noted that motoblock engines, as a rule, are calculated for the weight and pressure of wheels that are several times less than a caterpillar one. For this reason, it is better to equip your snowmobile with low pressure tires. This will help to avoid excessive fuel consumption and premature wear of parts. How a walk-behind tractor is converted into a homemade snowmobile, watch the video.
itemprop="video" >
When making a snowmobile, you need to heed the advice of experienced craftsmen:
When cutting a pipe with a circular saw, it is recommended to cut one side and then the other. So you will be able to get even workpieces. It is better to pre-cut the pipe into segments of the required length, since when cutting long workpieces, the plastic will melt and the saw blade may pinch.
The size of the caterpillar can be chosen at your discretion. It can be wide and short, narrow and long, but it should be noted that the handling of the vehicle will depend on its width. A vehicle with a wide track is more difficult to drive, and the load on the engine will also increase. A small caterpillar will sink into deep loose snow.
After people see the prices for snowmobiles in the store, they ask how to make a snowmobile from a walk-behind tractor, how expensive and difficult is it? How does the manufacture of homemade products begin - a snowmobile from a walk-behind tractor? First you need to determine how much engine power to use. We used a 6 horsepower motoblock engine as an engine. Usually, four-stroke engines with forced air or water cooling are installed on walk-behind tractors.
You can also use a reverse gear, centrifugal clutch, steering and fuel tank from a walk-behind tractor. Next, you need to think about the propulsion of the snowmobile. Most of them are fitted with a caterpillar drive.
Choice between homemade and factory options
When it comes to this topic, its root lies in the financial problem or the inability to find one or another ski model. It is at this moment that a person thinks about whether he can make the necessary part with his own hands. Home-made options are also offered by craftsmen who easily make not only skis, but also snowmobiles themselves.
Of course, factory parts? it is the standard of quality. They are created for a specific model by experienced specialists, and the snowmobiles on these skis are tested in various conditions beforehand. If the car is an expensive sports car, then it is better to purchase factory components for it. How to proceed ? buy a new model in the store or make everything yourself? the choice is up to the owner of the winter vehicle.
There are several manufacturing options: you can use tin, wood, plywood, old hunting skis and expanders for a snowmobile. [ads-pc-2]
How to make a snowmobile
You can make a snowmobile from different vehicles that are in the garage.
From a motorcycle
You can make a snowmobile out of a motorcycle using different models for this. The most popular are IZH and Ural. The advantage of this alteration is that no special changes need to be made. With good preservation of the funds, you can even leave your native frame.
The conversion technology is as follows:
- From metal pipes or appropriate corners, make a rectangular frame. Its optimal dimensions are 150 * 43.5 cm.
- In addition to the IZH motorcycle, it is necessary to make a steering beam. It is made from metal corners. The optimal dimensions are 50 * 50 * 5 mm. Additionally, the beam is sheathed with metal plates.
- After that, it can be installed horizontally on the drilling machine. Process the junction. Do the same with the frame. In these places, you need to make special grooves for secure fixation. In addition, attach a corner to the front frame.
- Now you can attach the motorcycle seat.
- You need to make holes in the spars.
- Between the front and middle part of the frame, it is necessary to place a channel to strengthen the structure.
- Regardless of whether a snowmobile is made from the Ural or another motorcycle model, it is necessary to select a caterpillar sprocket and a rubber band in advance. The optimal dimensions are 220 * 30 cm with a thickness of not more than 1 cm.
- Before installation, it is recommended to sheathe the caterpillar with nylon, which will allow the material not to delaminate during operation.
- Now you can move on to the transmission. It consists of two parts. The first - the front axle, is the leading one. It is made from a tubular shaft, caterpillar sprocket and roller. The second is the rear axle. It is made from a caterpillar drum and a tubular shaft.
- You need to finish the process of making a snowmobile by welding sheet metal skis.
When converting a motorcycle to a snowmobile, it is important not to change the steering system. In the final product, this part must perform its original functions.
The principles of rework are the same, they do not depend on the model of transport. But a snowmobile from a Ural motorcycle will be heavier.
From Zhiguli
The design of the car is characterized by simplicity, ease of control and high maneuverability. For manufacturing, you need to follow the instructions:
- Frame assembly. It is better to make it from pipes. The frame consists of a front and a central beam (steel pipes with a diameter of 5 cm), two lower diagonal elements (bent pipes with a diameter of 3 cm) and a rear strut. Welding is used to fix the elements.
- Installation of steering columns. To do this, two bushings must be placed on the front beam.
- Half shaft fixing. It is located on the rear frame, you first need to weld the body under it. It is made from a metal pipe with a diameter of 6 cm. Fix the axle shafts with bushings and electric rivets.
- Installing the engine from the car. First you need to make the front and rear fasteners on the central beam of the frame. First they need to be placed on the engine itself, and only then welded to the frame.
- In a homemade snowmobile, you can install large diameter wheels or sheet metal skis. In the first case, the rear and front wheels must be connected in pairs with a metal pipe. At the same time, make grooves in the hub for bearings, which are subsequently fixed with spring rings. Additionally, install a spacer between the bearings.
- On each wheel, install an asterisk depending on the expected maximum speed. This snowmobile can be used at any time of the year. For a snowy winter, a design is suitable in which the front wheels are replaced with skis.
- Steering system installation. It is taken whole from a car, for example, from Zaporozhets, or a motorcycle. The choice depends on personal preference. In the first case, gas, clutch and brake pedals are additionally installed. The gearbox is controlled by a lever and a rigid link.
- Installing the cabin of a snowmobile, the role of which is performed by the body of the car.
Manufacturing process
Consider several options for making skis with your own hands. First, let's define what this part should consist of. A standard ski consists of a base, a shock absorber, a link leg, a fork, its stem and a bipod. Also, sometimes an amplifier is welded and a skate is additionally installed.
The first DIY option? skis based on plastic overlays. To do this, they purchase expanders in the store and mount home-made connections to the suspension. One of the simplest models of snowmobiles is considered a mini-snowmobile. An old moped is used for it, including an engine and a frame with a seat. Any skis are suitable for this option, as the design is lightweight.
The second option is somewhat more difficult. It involves the manufacture of skis from metal. The necessary bend is determined by the owner himself. So, initially you will need the following materials: a metal sheet 3 × 4 mm thick, a piece of hydraulic pipe, a 6 mm pipe for rigidity, a polyethylene pipe with a diameter of 85 mm, bolts, self-tapping screws, metal for a mounting platform, paint. The length of one ski must be calculated taking into account the bend. As a standard, it is at least 1 m. The width of the sheet can be determined at 20 × 25 cm.
Such skis will fit a mini snowmobile, but they will be strong enough for other models. The weight of one such ski will be about 7 kg.
Work begins with determining the shape of the ski. To do this, it is better to use a stencil made in advance from cardboard. Then the shape itself is cut out and bent to the bend desired by the owner. Too much nose kink will collect snow instead of pushing it away. Along the edges of the ski, a stiffener from a 6 mm pipe is spot welded. To the nose, it should connect with the second rib, repeating a smooth contour. Now the platform for a suspension bracket is separately made? it is attached with screws to the ski. The platform with the nose is connected by an arc with a bend from a hydraulic pipe. The upper part of the base of one ski is ready.
Work on the lower part begins with the ridge. For this, a hydraulic pipe is taken and bolted in four places. The skate must be firmly fixed. Previously, the pipe is compressed at the attachment point. Now you need to attach the straightened polyethylene pipe with self-tapping screws. It is pre-cut lengthwise. Sometimes it is advised to use polypropylene sewer pipes instead, but they become very brittle in frost, which cannot be said about polyethylene. After the ski, you need to paint and think about what to make the suspension from.
My homemade snowmobile with a rubber track was able to move not only in shallow snow, but also on almost any off-road.
Then it will be possible to drive not only on compacted snow, but also on open ground.
Snowmobile assembly.
Lifan-type engines are very well suited for building snowmobiles, the author decided to use a similar Sadko GE 200 R engine with a volume of 200 cubic meters for 6.5 horsepower.
This engine already comes with a reduction gear (½) and a centrifugal automatic clutch that works with an increase in engine speed, which is ideal for homemade, snowmobiles, walk-behind tractors, go-karts and other equipment.
The photo shows a Chinese-made Sadko engine.
The snowmobile frame is made of a 25 x 25 profile pipe with a wall thickness of 2 mm.
The caterpillar is made of a 3 mm thick conveyor belt, the width of the belt is 300 mm, the belt itself was cut lengthwise in half by 150 mm.
The tracks are made of a plastic water pipe with a diameter of 40 mm and a wall thickness of 5 mm. The pipe is cut along.
The tracks are bolted to the conveyor belt with M6 bolts with a wide head, the bolts are tightened with a nut through a washer and a grover. The edges of the tape are connected by the same bolts.
Leading axle of the caterpillar.
Driven star from Minsk.
Stars for the caterpillar from the Buran snowmobile, self-made guide drums.
The supporting ski removes part of the load from the caterpillar, at the top there are guide rollers.
The rear axle moves along the frame along the guide, which allows you to stretch the snowmobile's track.
The front axle is stationary.
Driven and leading stars, as well as a chain from a Minsk motorcycle. Chain drive with gear ratio 1 to 3.
See also: Welding wire for stainless steel for semi-automatic
Steering rack.
The hinges are made using a threaded connection, nut and stud on M16.
The skis were taken from a children's snowmobile and reinforced with a profile pipe.
The photo shows how the star engages the caterpillar track.
The seat is made of plywood in the form of a box, in front there is a place for a child, in the back for two adults.
Medium support ski.
The equipment is ready for testing.
The snowmobile goes confidently with a full load.
In the photo, the author of the homemade product: Evgeny Venglovsky.
I recommend an interesting video by the author about the assembly of a caterpillar snowmobile and its testing.
Remembering the history of the creation of a homemade snowmobile, I realized how long ago my passion for designing equipment began. Even in my youth (and now I am already a pensioner) I received the specialty of a locksmith and mastered welding and other specialties of metalworkers on my own. But to tell the truth, he could not “boast” with his knowledge of design, and there was nowhere to learn. On a whim, he built all sorts of “dryndhods” on wheels and caterpillars: he rode them both off-road and in the snow, but there was neither reliability nor beauty in them.
But at the beginning of 1988, “Modeler-Constructor” was published, in which there was an article about the snowmobile “The caterpillar around the ski”. This is where it started!
Our places are such that the snow cover lies for six months or even more! Local roads are usually cleaned at the wrong time, and even then in such a way that only an all-terrain truck can pass. Well, there is nothing to say about country roads. In addition, I had hobbies: hunting and fishing. That's all this and spurred to make a solid passable snowmobile.
I built it for myself, helped friends, relatives, gained experience. He constantly improved the design “according to the laws of evolution”: he replaced the heavy one with a light one, the unreliable one with a strong one, introduced suspensions: spring, spring, shock absorber. In total, he built more than a dozen snowmobiles: on caterpillars with wooden and polyethylene tracks around a ski-skiz; rubber with a block of rollers; and with one control ski, and with two.
I'll tell you a story about my last snowmobile. I can’t say that it has no flaws, but I put all the accumulated experience into its design and the car turned out to be successful, although without frills (or, as they say now, utilitarian), but it looks good, and reliability is on height.
The layout of the snowmobile was chosen as the most common, both on similar domestic vehicles and on foreign ones: two front steerable skis; power unit located in front under the hood; further - the caterpillar block, and above it is the seat and behind it is the trunk. The total length of the snowmobile is 2300 mm, the width along the outer edges of the skis is 900 mm, the height to the steering wheel is 1000 mm, to the seat is 700 mm.
Snowmobile "Bullfinch":
1 - controlled ski (2 pcs.); 2 - controlled ski suspension (2 pcs.); 3 - arc (pipe Ø32); 4 - hood (from the side trailer of the motorcycle "Java"); 5 - windshield; 6 - steering wheel; 7 - fuel tank (welded from two moped); 8 - seat; 9 - tool box; 10 – trunk guard (pipe Ø16); 11 - mudguard (steel sheet s0.5); 12 – spring shock absorber for the suspension of the tension pendulum levers of the caterpillar block (2 pcs.); 13 - headlight; 14 - caterpillar block
snowmobile frame:
1 – lower spar (pipe 28×25, 2 pcs.); 2 - upper spar (pipe 20 × 20, 2 pcs.); 3 - L-shaped bracket for fastening the support bearing housing of the power unit output shaft extension (pipe 28 × 25); 4 - pod-kosnaya interspar rack (pipe 20 × 20); 5 - removal (pipe 28 × 25.2 pieces); 6 - support plate of the steering shaft cup (steel sheet s3); 7 - a glass of the steering shaft (pipe Ø32); 8 – steering column (pipe Ø32); 9 - stand-arc, 2 pcs.); 10 – seat frame (pipe Ø20); 11 – seatpost (pipe Ø20); 12 - strapping of the tool box (steel corner 20 × 15); 13 - welded bracket for fastening the caterpillar block and the tension of the caterpillar (2 pcs.); 14 - bracket brace (pipe 20 × 20, 2 pcs.); 15 – semi-frame of the luggage area (pipe 20×20); 16 - rear shock absorber mounting lug (steel s4.2 pcs.); 17 - strut of the semi-frame of the trunk (pipe 15x 15.2 pcs.); 18 - brace of the lower spar (pipe 28 × 25.2 pcs.); 19 – traverse (pipe 28×25); 20 – cross member of extensions (pipe 28×25); 21 – steering column suspension cross members (pipe Ø16); 22 – motor subframe (pipe 28×25); 23 - coupler-support (steel plate); 24 – cross member of the lower spars (pipe 28×25); 25 - tie-lock of the fuel tank; 26 - a longitudinal element of the seat niche (pipe 20 × 20.2 pieces); 27 - kingpin bushing (bicycle, reinforced, 2 pcs.); 28 - strut of the kingpin bushing (pipe 20 × 20, 2 pcs.)
Under the hood:
a – right side view; b – left side view
The power unit (engine, clutch and gearbox in one unit) is Tula-200m manufactured by TMZ (Tula Machine-Building Plant). It was put on any motorized equipment manufactured in Tula: scooters (including the cargo Ant), motorcycles, etc. The unit is quite reliable, although heavy.
The power of the new motor was 11 hp. with speed up to 3600 per minute. But he is no longer a decade old. However, eight or nine forces, according to my feelings, are still preserved in it. The engine has a working volume of 196 cm3, two-stroke and runs on a mixture of low-octane gasoline with engine oil (Avtol type) in a ratio of 10:1.
The cylinder is equipped with regular forced air cooling.
See also: waste oil stove
The gearbox has a gear ratio of 2.353.
To transfer rotation from the secondary (output) shaft to the drive shaft sprocket, it was necessary to make a welded extension from a pipe with slotted tips. At one end, internal splines are cut directly into the pipe (for fitting the extension onto the shaft). On the other - external slots for the adapter, a seat for the bearing and a M20x1.5 thread for mounting on the sprocket extension, made on a welded tip.
Looking ahead, I note that exactly the same tip is welded to the drive shaft of the caterpillar, which is made from the tension rear axle of the caterpillar from the Buran snowmobile.
The snowmobile frame is spatial, welded from steel pipes of rectangular, square and round sections.
The basis of the frame is two paired tubular spars - upper and lower. The upper spar of each pair is made of a pipe with a section of 20×20 mm. From the same pipe and most of the auxiliary elements: intermediate crossbars, struts and even the rear frame of the luggage area. The lower spars - from a pipe with a section of 28 × 25 mm - this is the thickest pipe in the frame structure. From the same pipe, the front traverse, front cross members and consoles, sub-engine ridge.
I must say that the frame pipes are small and not even thick-walled sections. And therefore, in places where I drilled holes, I inserted bushings into them and welded them in a circle.
The superstructure of the frame (racks, arcs) is made of a round pipe with a diameter of 20 mm - from old chairs, thin-walled, but strong enough. But it was difficult to weld them, but if this is done using a semi-automatic device, the process is greatly facilitated. The frame of the trunk under the seat, as well as the frame of the middle part of the platform, is made of an equal-shelf 15-mm corner. Between these frames, I put long items, such as skis. The steering shaft column - made of a 32 mm diameter tube - is integrated into the front of the superstructure. Pivot bushings are cut from bicycle frames and welded to the ends of the crosshead. The brackets of the caterpillar tension units are also integrated into the frame (welded to the rear ends of the lower spars). The same brackets also serve as attachment points to the frame of the caterpillar balancer shaft bearing housings. In addition, numerous ears, eyelets for installing the power unit, fuel tank, seat, shock absorbers, etc. are welded to the frame elements.
Extension of the secondary (output) shaft of the engine (welded part):
1 - extension; 2 – a tip for a nozzle on a shaft; 3 - tip for the drive gear
Rice. 4. Track block:
1 - caterpillar; 2 - caterpillar drive gear (2 pcs.); 3 - caterpillar drive shaft assembly; 4 - spring (2 pcs.); 5 - bracket of the balancing block (2 pcs.); 6 - pendulum lever of the tension axle (2 pcs.); 7 - tension gear of the caterpillar (2 pcs.); 8 - track roller (10 pcs.); 9 - extreme trolley (2 pcs.); 10 - medium cart; 11 - axis of the balancing block; 12 - supporting roller (2 pcs.); 13 - housing with a bearing of the axis of the balancing block (2 pcs.); 14 - bracket for fastening the spring to the axis of the balancing block (2 pcs.)
Track block balancer
The caterpillar block (more precisely, its longitudinal half) was borrowed from the old Buran industrial snowmobile. Why half? Yes, because, firstly, it is easier. Secondly, there are less costs and a simpler design. Well, and thirdly, I intended to ride not on the virgin snow, but in the footsteps of the "pioneers".
However, in combination with a pair of rather wide skis, the snowmobile confidently overcomes both deep snowdrifts and freshly fallen “powders”.
The outer bogies have been redone - the springs have been removed, and the bushings are welded together, as the bogies balance on their own, sitting on their axis at the ends of the springs.
The track tensioner has also been redesigned. The front ends of its pendulum arms sit on a common axle with a spring balancing unit, and the rear ends are suspended on self-made spring shock absorbers to the frame.
The propulsion of the snowmobile is a rubber caterpillar 380 mm wide (there are two of these on the Buran). The caterpillar drive is carried out from the drive shaft through a pair of 9-tooth "Buranovsky" kapron wheels. The drive shaft is tubular. As noted earlier, it is made from the rear tracked "Buran" axle, mounted in 80205 bearings, the housings of which are attached directly to the upper frame spars. The tension of the caterpillar is carried out by a tension axle with gear wheels (the same as drive wheels) through a pair of pendulum levers mounted on the axle of the balancing bogie (by moving its bearings along the frame spars). The tension shaft of the caterpillar (or rather, the axle, since this part does not transmit torque) with gear wheels is also “Buranovsky”. The contact of the caterpillar with the road along the length is a little more than a meter.
Previously, he built propellers with a support ski-ski. They are good on "puffy" snow and snowdrifts, but are very sensitive to hard bumps in the road. From them - not only discomfort is transmitted to the driver, but breakdowns of the tracks and even the slide itself occur. Therefore, this time I decided to make a mover with a rubber caterpillar and track rollers, as I intended to drive on rolled snow and even ice.
The transmission of a snowmobile, as they say, could not be simpler, although not without zest. It consists of a single-stage chain drive from the IZH motorcycle with a pitch of 15.875 mm with a pair of sprockets: the drive has 15 teeth, the driven has 21, that is, the gear ratio is 1.6. The secondary (output) shaft of the power unit is extended by a pipe with internal splines on the end mounted on the shaft and a splined tip on the other. The free end of the extension is mounted in bearing 80205, the body of which is fixed on an L-shaped bracket welded to the frame. A chain drive sprocket is mounted on this tip through an adapter with internal and external splines. The driven sprocket is planted (also through a splined adapter) on the splined tip of the caterpillar drive shaft. I made adapters from gears: annealed, machined, milled. Thanks to splined adapters, the sprockets (and, consequently, the gear ratio) are easy to change even in field conditions under road conditions (more precisely, under the density and depth of snow cover).
See also: Designation of welds on construction drawings
Guided snowmobile skis are homemade, 900 mm long (blank - 1000 mm) and 200 mm wide. Made from 2mm thick steel sheet. The runners are stamped: in the middle there is a triangular groove, and along the edges there are flanging-undercuts, bent up in front (contact surface with snow - 800 mm). From above, longitudinal stiffening ribs of a U-shaped section, curved from the same steel sheet, are welded to the skids, and ears and eyes for attaching suspension units are welded to them, and in front are shackles made of a 10-mm steel bar.
Each ski has a suspension consisting of a shock absorber (from the Tula scooter) and a homemade lever made of a 20 × 20 mm square tube.
Steering - mixed type. The steering wheel itself is a motorcycle lever, and the rest is like a car. The steering shaft is a “breaking point” with a cardan joint and even a kind of steering mechanism. He made it a “turning point” because he did not enter into a “parallel” with pivot bushings in any way (but, in fact, a straight shaft is better). It should be noted that the lower end of the shaft was structurally ahead of the swing arms and rods, and the bipod was directed backwards. In this position, when turning to the right, the steering wheel had to be turned to the left, and vice versa, which was contrary to common sense. Therefore, it was necessary to introduce a steering mechanism that serves to coordinate the turn of the steering wheel and the direction of the skis. The mechanism is a pair of identical gears in a housing. The drive gear is splined onto the end of the steering shaft, and the driven gear shaft is connected (welded, although this assembly is expedient and easy to make also collapsible) with a T-shaped bipod. From the bipod through the steering rods and steering knuckles, the skis are now simultaneously rotated in the same direction as the steering wheel is turned.
Equipment. The fuel tank is welded from two tanks from the Riga moped.
The seat - from the motorcycle "Minsk" is mounted on racks with sheathing made of duralumin sheet. Under the seat there is a tool box, and between the box and the floor there is a free niche with an opening at the back. If necessary, I put skis, a shovel and other long items in it. The hood is a redesigned front part of the stroller (side trailer) of the Java-350 motorcycle. Electrical equipment is standard. Headlight - from the motorcycle "Minsk".
Guided ski:
1 - snake; 2 - amplifier; 3 - bow; 4 - shock absorber attachment eye; 5 - lever mounting eye
Guided skis
Steering:
1 - steering wheel (bicycle); 2 – the top knee of a steering shaft; 3 - bracket for supporting the upper knee of the steering shaft (furnishings); 4 - universal joint; 5 - steering column; 6 - the lower knee of the steering shaft; 7 - clamp spline connection of the lower knee and the pinion shaft; 8 - drive shaft-gear; 9 - driven shaft-gear; 10 - bipod; 11 - the axis of the bipod and steering rods; 12 - steering rod (2 pcs.); 13 - tip for adjusting the length of the steering rod (2 pcs.); 14 - locknut 15 - steering lever (2 pcs.); 16 - axis of thrust and lever (2 pcs.); 17 - steering knuckle (2 pcs.)
Silencer diagram:
1 - receiving branch pipe; 2 - body; 3 - silencer; 4 - outlet pipe
Snowmobile sled trailer:
1 - drawbar; 2 - cross member; 3 - bracket-eye (2 pcs.); 4 - thrust (2 pcs.); 5 - ski (2 pcs.); 6 - body; 7 - rack (10 pcs.)
Assembling a snowmobile on a slipway
Sledge trailer - homemade. I think it's better to have a small sled than a big trunk on a snowmobile: if you get stuck somewhere, you can unhook the sled, tread the path and hitch it again. The body was once the body of the side trailer of the Java-350 motorcycle, or rather what was left of it after the manufacture of the hood for the snowmobile itself. It was shortened by cutting out about 200 mm in the middle. Then I riveted the front and back parts with pop rivets. Under the body, I placed several crossbars from a rectangular pipe 40 × 20 mm, one of the wide walls of which was left as ears at both ends. The ears were attached to the sidewalls of the body with rivets.
The body is mounted on skis from aluminum panels of the electric busbar by means of tubular racks of square section 20 × 20 mm. Racks at the top are welded to the crossbars with ears and at the bottom - to the "heels" - steel square plates 2 mm thick. I riveted the “heels” to the ski runners with the same rivets.
I want to note that the drawings of the nodes are not working, but introductory: some do not have all the dimensions (for example, frames), somewhere something may not match, since the drawings were made according to an already finished design.
But in general, I believe that the manufacture of a structure according to drawings is already production, and not creativity.
V. SMIRNOV, Syava village, Nizhny Novgorod region
Noticed an error? Select it and press Ctrl+Enter
to let us know.
Snowmobile design
Such engines have a gearbox that reduces speed by half and an automatic clutch in an oil bath. They are used on mini-tractors, walk-behind tractors and other garden equipment. In the manufacture of my snowmobile, I took some components and parts from the Buran snowmobile: a caterpillar, two pairs of carts with four rollers, a caterpillar driven shaft assembly and drive stars. I bought all this in stores selling spare parts for snowmobiles.
A rear pendulum with a driven shaft and rollers supporting the caterpillar (wheels from a children's scooter) was attached to the balancer thus obtained from two carts.
Reference by topic: DIY snowmobile
Snowmobile from a motorcycle: a guide for craftsmen
Making a snowmobile out of a motorcycle is not so easy. If the assembly of previous products practically does not cause difficulties, then this design will have to suffer. To work, you will need not only tools, materials and equipment, but also skills in working with a welding machine and other equipment.
Important! Motorcycles "Ural", "Izh" and "Dnepr" are the most suitable models for making a snowmobile with your own hands.
Snowmobile construction technology
- They make a suitable frame from metal pipes of different diameters and steel corners. Its base is made in the form of a rectangle (its dimensions are 150 x 43.2 cm).
- The steering beam is constructed from metal corners (its dimensions are 50 x 50 x 5 mm), its parts are sheathed with dense metal plates. The finished structure is installed in a horizontal position on a drilling machine.
Motorcycle Izh
- The frame and the finished beam are processed at the joints, special grooves are prepared for reliable fixation of the elements.
- The front crossbar of the frame is equipped with a strong corner.
- Attach the seat to the frame.
- Make holes in the spars.
- A channel is welded between the steering and middle sections.
- Select a suitable caterpillar sprocket and rubber band for further installation (suitable dimensions - 2200 x 300 mm, thickness - no more than 10 mm).
- The caterpillar itself is carefully sheathed with nylon so that the material does not delaminate during use.
Snowmobile from a motorcycle
- Install the transmission, which consists of a front and rear axle. The front one is the leading one, it consists of a tubular shaft, a caterpillar sprocket and rollers (the asterisks themselves are fixed on through bolts). The rear axle structure consists of a caterpillar drum and a tubular shaft.
- Skis are welded to the snowmobile structure (steel sheets and metal corners are used for their manufacture).
The control system of a homemade snowmobile from a motorcycle is quite complicated to design. It consists of:
- longitudinal traction;
- transverse traction.
From the information presented, we can conclude: a home-made snowmobile from elements of a walk-behind tractor, chainsaw or motorcycle is a reality. It can be made by anyone who wants to. For productive work, only certain skills, equipment, tools and materials will be required.
Production of racks
If you drive a snowmobile only on loose snow, then the attachment of skis to the racks can be made rigid. With such a suspension, the snowmobile will be more stable on loose snow.
I used twisted springs in the suspension, which are placed on the carts of the Buran snowmobile. They are on sale and are inexpensive. The stiffness of two springs on each ski is enough.
