Planting potatoes with a walk-behind tractor is a convenient way to mechanize the laborious and tedious process of planting potatoes in the ground. Anyone who has planted potatoes at least once knows how long this process takes, especially if the area is large. But if you install a potato planter or hiller on a walk-behind tractor, the task of planting potatoes will be solved not only several times faster, but also better, and it will take less effort.
In addition, it is possible to weed growing potatoes with a walk-behind tractor, which also facilitates agricultural work. In this article, we will look at different ways of planting potatoes using a walk-behind tractor.
You can plant potatoes with a walk-behind tractor
How to plant potatoes with a walk-behind tractor
A potato planter is an attachment that includes a hopper for root crops and a mechanism for loosening the soil. Planting potatoes with it is no more difficult than using a hiller, which we will also consider in detail. The main difference between these methods is that the hiller allows you to make the work semi-automated, while with the help of a potato planter, planting potatoes becomes fully automatic.
There are other differences in the technique of planting potatoes with a hiller and a potato planter. One of the significant differences is the speed at which the landing is made. It should be borne in mind that if you plant potatoes with a walk-behind tractor with a hiller, after cutting the furrow, you must manually go along the ridge and lay the planting material in the recess, and then fill the trench. If the tubers are planted with a potato planter, in one pass along the row, all tasks are performed at once - plowing, laying a furrow, laying potato tubers in it and falling asleep with soil.
Regardless of what equipment is used on the walk-behind tractor - purchased or home-made, it must be equipped with lugs, without which it is more difficult to land in loose ground.
In this video, you will learn how to plant potatoes using a walk-behind tractor: Before you start planting, you need to check the condition of the walk-behind tractor:
- make sure the fuel and oil level are sufficient;
- remove the lock from the wheels;
- open the fuel supply valve;
- turn the ignition to the "On" position;
- start the motor.
Field plowing equipment
The walk-behind tractor, also known as a motor cultivator, is widely used to facilitate heavy manual agricultural labor.
Before buying equipment for plowing the field, you must select:
- walk-behind tractor;
- trailer equipment.
Choosing a walk-behind tractor
A mechanical self-propelled device with an engine today is simply indispensable for the following earthworks:
- plowing;
- landing;
- hilling;
- alignment;
- loosening.
When choosing a walk-behind tractor, it is necessary to take into account the area of \u200b\u200bthe area to be treated.
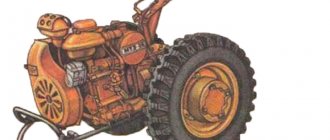
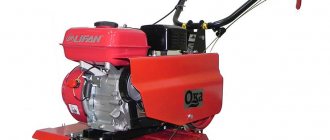
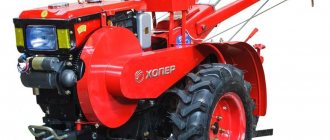
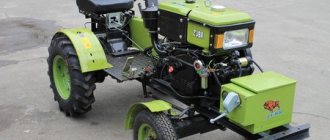
The modern technology market offers the following popular types of cultivators:
| Photo and name | Peculiarities |
| Cultivator |
|
| Motor cultivator |
|
| Motoblock light |
|
| Motoblock average |
|
| Motoblock heavy |
|
Choosing trailer equipment
To plant potatoes with a walk-behind tractor, you need trailed equipment.
Trailer equipment for motoblocks:
- Adapter. It is most convenient to control the walk-behind tractor while sitting in a chair. To do this, there is an adapter - a special seat for small tractors.
- Plow. This trailed equipment is used for cultivating hard soil or for opening virgin soil.
- Harrow. It is better to harrow the plowed area in order to level the field from large earthen clods and prepare it for cutting furrows.
- Disc hiller. It will help to loosen the soil between the planted rows of potatoes, spud the stems. Another use of the hiller is cutting furrows for sowing vegetable crops.
- Double row hiller. It is irreplaceable for a kitchen garden and processing of row-spacings of saplings.
- Potato planter. The purpose of the potato planter is to plant a vegetable crop on a previously prepared arable land. Trailer equipment allows you to plant potatoes at a set depth and a given width.
Adapter
Harrow
Disc hiller
Double row hiller
potato planter
Plow
Landing under the plow
Features of using a plow when planting potatoes:
- high speed of work;
- universality of technology;
- low-cost trailer equipment.
You can plant potatoes with a plow in the following way:
- Plow the field with a plow.
- Cut the combs.
- Lay the potato tubers in the furrow.
- Close the furrow with earth by pointing the plow in the opposite direction.
The video shows how to plant potatoes with a walk-behind tractor under a plow. The video was filmed by the City & Country Style channel.
Landing with a disk hiller
Features of the disk hiller when planting potatoes:
- high potato combs;
- there is no need to add soil;
- the possibility of attaching a plow;
- high cost trailer equipment.
Planting potatoes with a disk hiller
Potato Planter Application
The potato planter is the following set of designs:
- furrower;
- conveyor;
- distributor of potato tubers;
- disk hiller.
Features of using a potato planter:
- high landing speed;
- ease of operation;
- planting potatoes is carried out in one pass along the crest of the site.
Planting with a potato planter
The use of a two-row hiller
Features of using a two-row hiller when planting potatoes:
- cutting arable land into two rows at the same time;
- high planting speed.
Landing with a double-row hiller
Planting a potato planter
Obviously, planting potatoes with a potato planter is much easier and faster than the “old fashioned way” - with a shovel and a bucket of potatoes. Of course, a potato planter for a walk-behind tractor is a mechanism consisting of several parts:
- bunker for root crops;
- potato feeding mechanism;
- soil baking powder;
- disk mechanism for filling the furrow with soil.
This unit consists of several elements.
Since many farmers and summer residents prefer to assemble a potato planter on their own, the designs may vary, but the principle of their operation is the same: a recess is made in the soil, the seed material is immersed in it, the recess is covered with soil. Planting potatoes is divided into several steps:
- Prepare the soil for planting in the traditional way for this type of soil - plow or harrow.
- Adjust the potato planter - adjust the depth of the furrow and the width between the rows.
- Pour potatoes into the seed hopper.
- Place the walk-behind tractor on the site at the start of planting and start planting potatoes.
It should be borne in mind that home-made potato planters for walk-behind tractors are no less popular than purchased ones. The reason is that a home-made potato planter made for a walk-behind tractor copes with the task no worse than a purchased counterpart, but at the same time it was developed by the owner for himself.
To make a potato planter for a walk-behind tractor, you need to have the necessary parts. There are enough drawings on the Internet, and the design itself is quite simple. To assemble a potato planter with your own hands, you need the following materials:
- for the assembly of the bunker - plywood or sheet metal 2-2.5 mm thick;
- metal pipes with a diameter of 25-40 mm;
- wire 5 mm thick;
- a chain (for example, one that is put on engines);
- bearings;
- a profile steel pipe, necessary for assembling frame parts, with a wall thickness of 2 mm;
- wheels.
You will also need tools:
- welding machine;
- grinder (requires a disc for metal);
- drill with drills;
- pliers;
- hammer;
- screwdrivers.
Do not forget about the appropriate tool for assembling the bunker
When creating a potato planter for a walk-behind tractor with your own hands, the first step is to draw up a project. The type of device is selected, the parameters of the potato planter are set and applied to the drawing. Note that the easiest way to make a potato planter is one of two common and proven types:
- Potato planter with spoon feeding of seed material. Such equipment provides for the presence of a belt with fixed spoons for laying tubers in the soil.
- Flat Belt Feed Potato Planter - Provides for stacking potatoes using horizontal belts.
Experience shows that the most convenient dimensions of a single-row potato planter for a walk-behind tractor are as follows:
- height - 60 cm (measured from the bottom edge of the baking powder to the top edge of the potato hopper);
- bunker height - 27-30 centimeters;
- bunker width - 22-28 centimeters;
- wheel cross section - 15-20 centimeters.
The design of such a homemade product is based on a frame made of a profile pipe - all other elements of the device are mounted to it. The frame includes two longitudinal spars connected by three crossbars. If necessary, the frame can be reinforced with steel profiles.
As mentioned above, the hopper is assembled from sheets of steel or plywood, however, if desired, a plastic cone-shaped container of a suitable size can be used. If there is no such container, parts of the bunker are cut out according to the drawing and connected with corners. Regardless of whether a metal or plywood bunker is assembled, the finished part must be painted with moisture-resistant paint in one, and preferably in two layers. And so that the sprouted potatoes are not damaged, the inner surface of the bunker should be trimmed with thin rubber. After the part is assembled, it is placed on the frame with bolts.
Wheels can be assembled with non-removable lugs. To do this, you need a car disk, metal strips and knitting needles. Grousers - metal plates made of sheet steel are suitable for them - are welded to the base at a low angle. However, if desired, you can also install ready-made wheels of a suitable size on the device - from a garden cart or some other equipment. Hubs are welded to the wheels, two bearings are placed on each and the wheels are attached to the frame.
In addition to these parts, rippers and holders are also needed. The holders are made of a profile pipe - you need to weld two square rods of 50 × 50 centimeters from it. The bars, in turn, are welded on both sides of the frame.
Rippers are cultivator shares made of sheet steel, which are assembled with holder posts using bolts.
You will also need rippers
Planting potatoes under the plow
This method of planting potatoes can be done with one of two types of attachments. Manufacturers offer the following types of plows:
- single-hull plow;
- okuchnik with a V-shaped ploughshare.
These two methods are different. Let's consider them in more detail.
Planting potatoes with a walk-behind tractor with a single-hull plow involves repeating several steps:
- install the plow on the walk-behind tractor;
- by means of bolted connections, set the share to a position at which it will sink into the soil to a depth of 10-15 centimeters;
- go one row with a plow - make a furrow;
- spread the potatoes into the resulting recess at a distance of 20-25 centimeters from each other;
- go back with the plow in such a way as to completely fill the furrow;
- at the end of the row, change direction and complete the next furrow, stepping back from the previous one by 60-65 centimeters.
The disadvantage of this method of planting potatoes can be considered the difficulty of adjusting the position of a single-furrow plow. Due to this, the walk-behind tractor constantly moves in an inclined position, since one of its wheels moves on soft ground, and the second wheel on virgin soil.
Planting potato tubers with a walk-behind tractor using a hiller plow with a V-shaped share involves the following steps:
- plow the area for potatoes so that the furrows go from each other at a distance of 60-65 centimeters so that when cutting each new furrow, the walk-behind tractor moves near the edge of the previous row;
- put potato tubers in the formed furrows at a distance of 20-25 centimeters from each other;
- fill the furrows with soil, positioning the walk-behind tractor in such a way that the wheels go along the neighboring furrows, and the plow passes along the aisle.
Technology of planting potatoes with a walk-behind tractor
Tips for the correct landing of walk-behind tractors Profi, Viking, Crosser, Patriot, Caiman:
- The row spacing when planting potatoes with a walk-behind tractor should be from 55 to 65 centimeters.
- The furrows must be made even, this will simplify the care of the root crop.
- Before planting, you can fertilize the soil.
- The distance between tubers is 25-30 cm.
The depth of planting potatoes under the walk-behind tractor is 10-12 cm.
When planting potatoes with a walk-behind tractor, make the distance between rows the same. Watch the track width, it should be uniform. When cutting furrows, try to make them even. If necessary, pull the ropes to navigate them.
Consider the main methods of planting: with the help of a hiller, a hinged element - a potato planter, planting under a plow, planting in a ridge.
How to plant with a hiller, at what distance and depth
For landing with the help of a hiller, wheels with lugs are placed on the cultivator. A Tarpan cultivator is well suited. Furrows are being cut. Potatoes will have to be planted manually. After landing, change the lugs to standard rubber wheels.
Changing the wheels is necessary in order not to injure the seed. The track width is left the same - 55-65 centimeters, and again walk along the furrows. The walk-behind tractor will fill the row with earth and compact the seed.
Landing with a hiller is a less expensive option. In the configuration of the unit should be only metal and rubber wheels, and the hiller itself. The inconvenience lies in the manual planting of potatoes. For large areas under crops, a mounted planter for a walk-behind tractor is used.
This method is considered the least laborious. The unit includes:
- The conveyor is a kind of conveyor that feeds the seed.
- Furrower, for laying a furrow.
- Distributor, for supplying potatoes at regular intervals.
- Disc hiller, laying and falling asleep furrows.
How to plant a potato planter
Thanks to planting potatoes with a planter for a walk-behind tractor, you can save three times as much time as when planting with a hiller. The process is completely mechanized. Potatoes are simultaneously planted and spudded. The potato planter has its drawbacks.
Landing with hiller
First of all, we note that several types of hillers are known for planting potatoes under a walk-behind tractor:
- single-row (only one furrow is cut in one pass);
- double-row (two furrows are cut at once in one pass);
- disk.
All hillers work on the same principle, since they are designed for the same function. But the difference, for example, between single-row and double-row hillers is that, with higher productivity, a double-row hiller requires much more traction of the walk-behind tractor and its operator. It is important to take this into account and use such hillers mainly on light ground.
Using a single-row hiller with a motor cultivator, potatoes are planted in a few steps:
- Install wheel lugs.
- Place the wings of the hiller in accordance with the selected width.
- Walk in rows along the landing site, laying furrows with ridges.
- Place the tubers in the recesses 20-25 centimeters apart.
- Remove lugs from wheels.
- Spread the wings of the hiller as wide as possible.
- Pass between the rows, filling the tubers with soil.
A two-row hiller provides more complexity, however, as in the method described above, the device must be re-equipped:
- Install lugs on wheels.
- Attach hitch.
- Fasten hanging mechanisms.
After that, the two-row hiller is set up. It is necessary to determine the maximum suitable distance between the working parts of the device. The standard distance is considered to be 60-65 centimeters, since it usually corresponds to the width of the future potato bed. When processing row spacing for planting potatoes, each hiller should be in their middle. After that, the potatoes are manually placed in the recesses and the furrows are filled up.
What you need to know before boarding
The tubers are allowed to germinate for two weeks before planting, and then all white sprouts are removed from them. At the last stage, small dense green sprouts will stick out of the potatoes. This means that the germination has come to an end.
Such actions allow tubers to grow faster for several weeks than usual. Try to choose clean potatoes without unwanted stains, and you can sprinkle fruits with cuts with wood ash.
The planting process is preceded by a basting of rows, between which it is necessary to leave a space of 65 cm for the proper development of potatoes. You also need to remember about the distance between the tubers in a row - this is about 25 cm, while the depth is usually 13 cm.
Weeding potatoes with a walk-behind tractor
As mentioned at the beginning of the article, it is possible to weed potatoes with a walk-behind tractor. For this, a flat cutter-weeder is provided - a fairly popular device. This attachment allows you to prepare the site for planting or to process the row spacing of potatoes. Flat cutters are known, in which special drums are provided for discarding weeds, as well as simple flat cutters with knives.
When weeding potatoes, it is necessary to place the wheels in the furrows.
When the walk-behind tractor moves, the knives cut the weeds, and the drum (if any) throws them back relative to the movement. When weeding, it is important to consider that the younger the weeds, the easier they are to remove, and more mature and vigorous plants may not be amenable to processing with this device. This is interesting: how to connect a potato digger to a Salyut walk-behind tractor.