The trimmer is a handy and easy-to-use tool for cutting grass and trimming small shrubs and trees. It often uses a fishing line (string, cord) as a cutting element, because it is cheaper than disc knives and is safer to operate. With intensive use of the tool, over time, you will need to change the fishing line on the trimmer. This process is similar on mowers from different manufacturers, be it Husqvarna or Huter, with possible minor differences.
What is needed to replace the cord
With regular use of the grass trimmer, the discs become dull, but they can be sharpened and continue to be used. The fishing line in the reel tends to end, so it becomes necessary to refill a new one, for which you need to determine the type of head and prepare the cord of the required thickness and length .
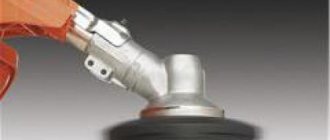
So, the mowing head is a cylindrical body in which a bobbin with fishing line is placed. Such a detail is present both on electric trimmers and on gasoline scythes of any brand, be it Bosch, Makita, Stihl or another brand. There are three types of heads, depending on the method of filling and feeding the fishing line.
- The principle of operation of the heads of the automatic group is that they independently feed the fishing line when the mower reduces the engine speed. Such designs are convenient when working on large areas, but have the disadvantage of high cord consumption.
- The heads of the semi-automatic group are easy to operate - automatic line feed is performed at maximum engine speed. To release the cord lock, gently tap the tool on the ground, after which the unlocked cord is pulled out of the spool. Cutting to the required length is carried out with a knife fixed on a protective cover.
- Trimmers with manual cord feed must first be turned off, and then pull out the line yourself.
On a note! The most convenient and optimal in price are semi-automatic cord spools.
Reels for electric and gasoline braids can be with one or two antennae of fishing line. The former are used for trimming low grassy growth, the latter for cutting tall grass and small shrubs.
Instruction
In order to change the fishing line, you need to remove the old one (if it was).
Coil. this is part of the trimmer design, which is located inside the head of the scythe, drum or reel. Depending on the manufacturer, the heads may be different. But in this article only Patriot is considered, although their mechanism is used by many other companies.
Annotation on how to unwind the manual head on the trimmer, described below.
- First, you need to clean the head of dirt and adhering grass, if it is dirty. To do this, you need to raise the brushcutter with the head up and, holding the casing, remove the special protective cover put on the drum.
- The next step is to remove the coil from the drum. The coil is simply removed even with one hand, since it is NOT fixed inside the drum in any way.
- The drum itself is fixed to the trimmers with a bolt. This bolt must be unscrewed, after which you can easily remove the drum. To do this carefully, you should support the drum with the coil, while unscrewing the screw counterclockwise.
- Now you can pull the coil out. As mentioned above, it is NOT fixed by anything, except for a hook with an iron shaft, therefore it does not need to be torn out with force. Carefully, with radial movements, remove the coil from the drum.
- Now it remains to remove the old fishing line and follow the subsequent instructions.
The installation of the coil and drum in its original place is carried out according to the reverse method.
Before the process of threading the fishing line, you should make sure that the thread suitable for the trimmer has been purchased. In this case, when the thread does not fit, the consumption of fuel or energy increases, as well as the load on the scythe engine.
In order to change specifically the thread itself, it is necessary to prepare a whine cut of the desired size. In most cases, this requires about 4 m of fishing line. A certain figure will depend on the characteristics of the whine, for example, its thickness, as well as on the characteristics of the coil itself. If it doesn’t work out exactly finding the length, you can do it as follows: stick and wind the thread to such a state that the coil is one hundred percent charged (the level of the fishing line will be compared with protruding from the sides of the coil). You need to make sure that the fishing line sits evenly in the spool.
Annotation for filling the fishing line into the reel is described below.
- The prepared thread must be taken and folded in half. It should be seen that one edge is 0.1-0.15 m longer than the other.
- Now it is necessary to take the ends in different hands. The one that is smaller needs to be pulled up to the larger one so that it becomes 2 times shorter. When bending, an indent of 0.15 should be maintained.
- Locate the slot inside the coil baffle. Carefully thread the loop that came out earlier into this slot.
- To continue working, you need to find the direction of winding the thread in the spool. To do this, it is enough to look around the coil. it should have an arrow on it.
- If the arrow-pointer could not be found, then it may well be that there is a written designation. An example is shown in the photo below. You need to look at the head of the coil. It has a direction indicator. But this is the direction of movement of the coil. To get the winding direction, you need to wind in the opposite direction.
- Now you need to fill the reel with fishing line. Worth Pay attention that inside the coil there are special guide grooves. When winding the whine, you need to follow these grooves, otherwise you can destroy the trimmer. At this step, you need to charge the coil very carefully.
- When the user has wound almost the entire thread, one should take the small end (do not forget about the protrusion of 0.15) and stretch it into the hole located in the wall of the coil. Now you need to repeat this action in the same way with the other end (on the other side).
- Put the reel itself in the head of the reel, before that, threading the fishing line through the holes inside the drum.
- Now is the time to put the drum back in its place. Then you need to take the ends of the fishing line with 2 hands and pull them to the sides. Then you need to put the cover back in place (here you can safely make an effort until you hear the corresponding click).
- All that's left is to do some cosmetic work. It is necessary to see if the thread is too long. You can start the trimmer and check in practice whether everything is comfortable. If the thread came out a little long, you can cut it with scissors.
READ How to Check the Coil on a Lawnmower
Preparing to change line
Before replacing the fishing line, you need to pull out and then disassemble the head. Usually it includes a casing, a spring (on some models), a bobbin with fishing line, a cover. It is necessary to disconnect the electric trimmer from the mains (or turn off the gas trimmer), and then proceed to remove the coil. It can be fixed in two different ways: in the first case, it is necessary to completely disassemble the head, and in the second, it is only necessary to remove it from the gearbox shaft on which it is attached.
First way:
- find the latches on both sides, press and remove the cover to open the internal structure of the head;
- there is a bobbin under the cover, it must be carefully pulled out of the body (sometimes a spring is hidden under it, it should also be carefully removed to the side so as not to be lost);
- after removing the spool, a fixing bolt (or screw) becomes noticeable in the center of the body, which must be unscrewed in the opposite direction to the clockwise movement;
- after removing the fasteners, it is necessary, holding the housing, to remove the coil from the gearbox shaft with shaking movements.
The second method involves the following steps. The coil head is put on the gearbox shaft. To disconnect it, you need to lock this shaft. Usually in braids, for example, the Champion or Calm brands, a hole is made for this, into which a nail, rod or screwdriver is inserted. After fixing the shaft in a fixed position, holding the body, start rotating the head clockwise, since the thread on the shaft is usually left-handed.
Now that the head has been removed and disassembled, it is necessary to determine how thick the cord should be. You can find out the appropriate diameter for your trimmer by looking at the user manual or at the bobbin itself, usually similar information is indicated on it . Another way is to insert the thread into the hole from which it is fed. If the rune goes without difficulty, it can be used for work.
On a note! To understand how much fishing line to wind for a reel, you need to wind it onto a bobbin so that the height of the skein is not greater than the diameter of the sides. If the cord protrudes beyond the edges, the coil cannot be hidden in the casing.
Line winding algorithm
The order of winding the fishing line depends on the type of reel - with one or two antennae, as well as with automatic cord loading.
On a reel with one antennae
It is very easy to wind the fishing line on the reel with one antennae. In such designs, depending on the brand of the trimmer, from two to five meters of cord is placed. The edge of the fishing line in the spool must be threaded into a special hole or groove, after which the string is wound in the direction opposite to the rotation of the reel during operation.
Advice! To understand in which direction to wind the thread, you should look at the body of the spool - usually marks are made on it indicating the direction of movement of the spool during operation.
After the fishing line is wound, you need to leave a small piece (15-30 cm), thread it through the spool outlet and assemble the head again.
On a coil with two antennae
In this type of spool, you need to inspect the inside of the spool and determine the number of cord winding grooves provided in it.
Important! If there is only one groove in the coil, then both antennae must be wound along a common groove, if there are two, then along separate tracks.
For winding, you need to take a piece of fishing line two to three meters long. For spools with one groove, thread the line into the through hole, align the whiskers, align and wind on the spool in the opposite direction to its rotation during operation. If fixing grooves are provided, thread the ends of the cord through them, then pull them out into the outlet, then close the coil and put it back in its original place.
For two-fluted bobbins, the difference is that the piece of string must be folded in half. Next, you need to charge the middle of the fold into the groove between the grooves, then wind each of the pieces of fishing line along its own path, fix the antennae and assemble the coil in the same way as a spool with one track.
Trimmer head with automatic threading
For heads with automatic threading, it is enough just to start and clamp the edges of the fishing line, and the tool will perform further winding on its own when turned on. It is impossible to make a mistake here, because the coil itself recognizes how the antennae should be located.
On a note! The advantages of trimmers with such a head include the convenience of laying the cord, and the disadvantages are high cost and complex repairs.
The device of the fishing line in the mower
The device of the element on which the nylon thread is wound is very simple. This element is called a coil. It has two "tracks" - upper and lower. Between these tracks there is a special partition with a notch. A fishing line is wound on these paths. First, it must be pulled through the recess.
In order to be able to pull out the coil without obstacles, it is necessary to unscrew the special button, which is located on the mower body.
Features of replacing fishing line on video.
The above unit can be made on your own and this article will tell you how to build a lawn mower from a trimmer with your own hands.
Fishing line - varieties and the possibility of replacing with other material
The cord for the trimmer can be of different diameters (from 1.2 to 4 mm), and you need to choose it depending on what vegetation you want to mow - the thicker the fishing line, the coarser the grass it will cope with. Experienced users recommend putting a 2 mm thick fishing line, which is universal.
The shape of the fishing line can be round (for succulent grass) or with sharp edges in the form of a square or an asterisk (for beveling dry grass). The second type is less durable and wears out faster than round cord.
One of the most popular questions regarding the operation of trimmers is whether it is possible to replace the special cord for mowers with other materials, such as metal or steel cables and strings, wire, etc. You need to know that the installation of such items is not recommended, because with them the trimmer turns into a dangerous technique. During mowing, pieces of wire or metal will constantly break off and scatter in different directions, risking injury to the worker. And if you accidentally touch their limbs during work, a serious injury is guaranteed.
We answer the owners of trimmers who are interested in whether it is possible to use fishing line - this is allowed, but it will tear and wear out much faster, which means that it will require frequent replacement.
Advice! Fishing line is well suited for cleaning grass near a fence or metal mesh - instead of wasting an expensive trim cord, you can load large-caliber tackle (2-3 mm), which costs much less.
Replacing a fishing line with a disc
Depending on the type of vegetation covering the garden plot (lawn) and requiring removal, the fishing line changes to a disc. This is necessary, since the cord is used only for grass of small height, and if you need to mow high growth, tree shoots or shrubs, it is better to use metal or plastic disc knives instead of a string. Installing them correctly is very simple, the detailed process is usually described in the user manual and is similar for trimmers of different brands, be it Al-Co, Oleo Mac, Patriot or other brand equipment. To change fishing line to knives, you must:
- block the shaft and remove the coil by turning it clockwise;
- put the knife on the sleeve;
- install the fixing cap and turn the nut in a counterclockwise direction, and then tighten it with a wrench.
You can read in detail how to change the spool of fishing line to a disc in the instruction manual for the device.
Safety
To quickly and safely change the line on the mower spool, safety precautions must be observed. Before removing the reel to wind the line on the lawn mower, it is necessary to disconnect the equipment from the power supply (if the mower is powered by electricity). Here I would like to mention the reliability rating of electric lawn mowers, which will help you choose a safe assistant.
Another important safety rule to follow is pressing the lock button . You can find out its location on the body of the equipment using the instruction manual. For example, you can find the instruction manual for a manual petrol lawn mower here.
Do not forget that the cutting element needs to be adjusted. There is an adjustment button on the body of the unit. If the process does not start automatically and the thread tension has loosened, then the button is clamped and the fishing line is pulled out of the reel with force.
It must be remembered that replacing the fishing line in a lawn mower is an important process that requires responsibility. Everything must be done in stages, and only a special polyethylene fishing line should be inserted into the reel. An iron cable, some kind of high-quality wire or even reinforced fishing line will not work here.
See video instruction.
Solving possible problems with fishing line
Most of the problems associated with fishing line are similar for different trimmers and are solved in a similar way.
string break
Regular line breaks are caused by:
- the presence of solid objects in the mowed grass: branches, stones, etc., contact with which breaks the string;
- mowing the grass close to the fence, and if it is mesh, then the fishing line breaks even faster;
- low-quality cord - it is necessary to replace it with a new reliable consumable;
- wear of the outlet holes in the mowing head, as a result of which the line breaks due to friction on the sharp edges of the bushings - it is necessary to replace the part with a new one.
Large line consumption
Usually the fishing line ends very quickly if you constantly knock the semi-automatic reel on the ground or press it to the surface with force . In this case, the head is unlocked, the cord is lengthened, and the knife cuts it. The second option for a quick consumption of fishing line is that a trimmer with an automatic reel is not used correctly. If the mower regularly lowers the engine speed, the string is constantly lengthened and cut, and as a result is quickly consumed.
String doesn't stay on
If the spring weakens in the semi-automatic type reel, the fishing line does not hold and unwinds during operation. The cord is pulled out, cut off with a knife, as a result, the owner of the equipment notices that the thread is quickly running out.
Advice! To check the tool, you need to remove the protective cover and start the engine - if the fishing line extends, this means that the spring must be changed to a new one.
Fishing line flies out
If the string flies out when mowing, this is another evidence that the spring in the bobbin is weakened or completely lost due to inaccurate disassembly of the head. As a result, the cord does not hold and jumps out during rotation.
String does not come out
In automatic and semi-automatic reels, the cord is fed without stopping the trimmer. If this does not happen, then:
- the fishing line in the head is wound incorrectly, so the reel does not spin;
- the winding of the fishing line is uneven, so the cord gets stuck between the turns and does not come out - to prevent this from happening, you need to wind the thread carefully, avoiding distortions, turn to turn;
- the ends of the cord coming out of the holes are very short, there is not enough centrifugal force to extract them, so the line is not fed - before turning on the trimmer, it is important to adjust the length of the thread without fail and slightly lengthen it, if necessary;
- cord slipped.
Coil does not spin
The reasons why the reel does not spin are similar to the lack of line feed. This is an incorrect or uneven winding of the string, its sticking, as well as short ends of the cord coming out of the holes.
The fishing line sticks together
If the fishing line sticks together during operation, the main reason is the installation of a low-quality cord. During operation, the coil heats up, and low-quality string melts and sticks together . The second reason is the collision of the cord with solid objects. In this case, its sharp braking occurs, the thread is drawn into the head and sticks.
Advice! To avoid problems, you can apply mineral oil to the surface of the fishing line or, after winding it on the head, spray it with silicone. A more competent solution would be to purchase a good quality head, which will allow you to forget about such problems.
So, replacing the line on the trimmer is not difficult if you know how to disassemble the reel and wind the cord. This process is similar for equipment of different brands. A detailed description can be found in the instruction manual of the tool or watch the video.


